
Getting in
The panel is the whole website's back room. Everything in this handbook happens there unless it says otherwise.
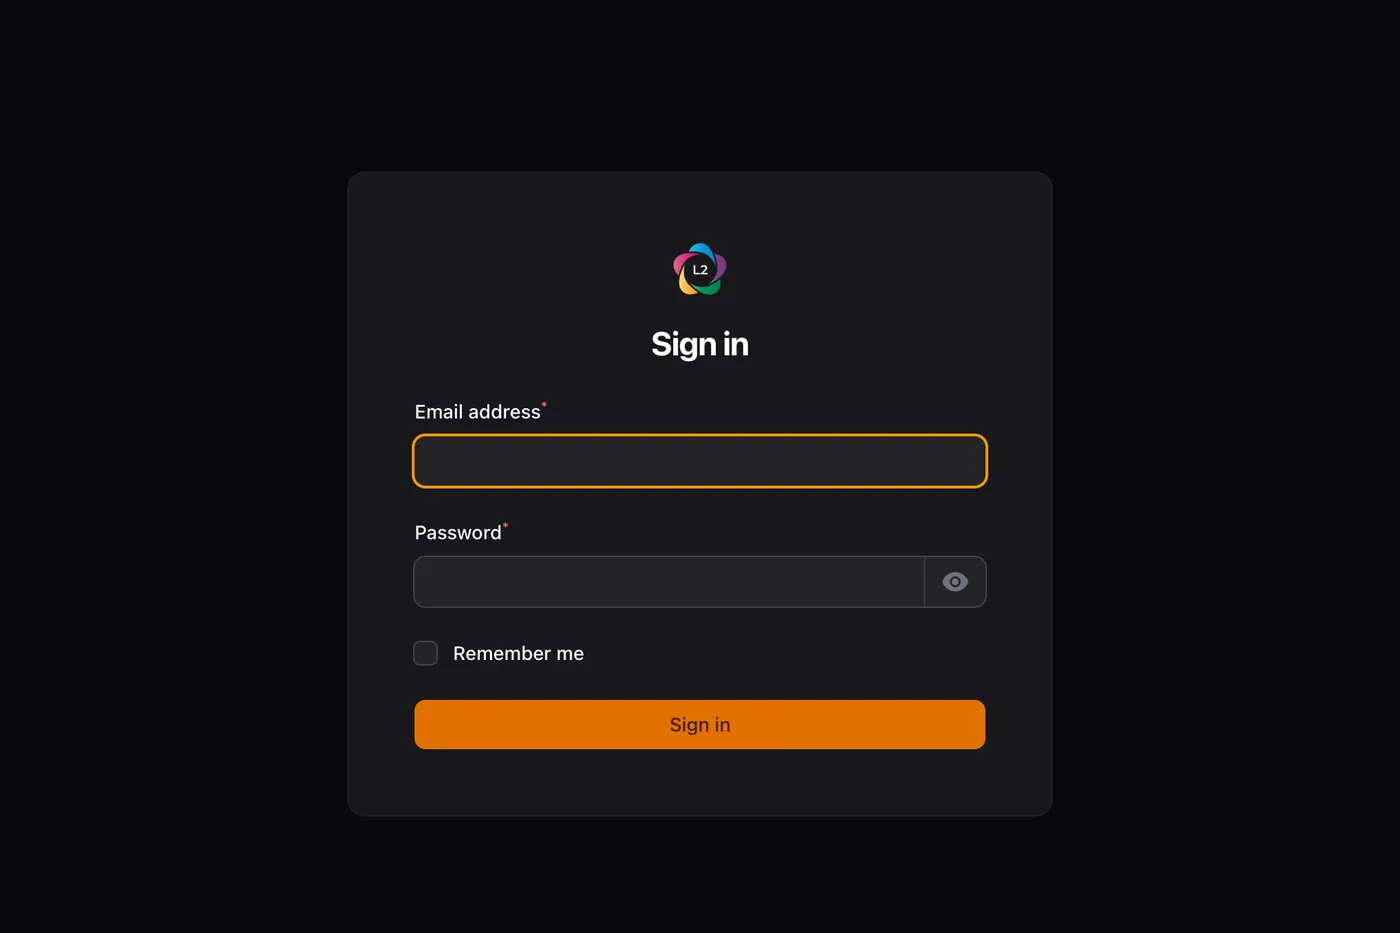
Go to www.l2icon.org/admin and sign in with your work email address. Forgotten the password? Use Forgotten your password? on the sign-in page; the reset link arrives from webmaster@l2icon.org, and lands in spam the first time often enough that it is worth looking there.
What you can see depends on your role
Everyone gets the menu for their own job and nothing else. If a section named below is missing from your sidebar, that is why — ask an administrator rather than looking for it.
| Role | Can do |
|---|---|
| Administrator | Everything, including staff accounts, payments, email and branding. |
| Event manager | Events, agendas, speakers, organisations, venues, tickets and promo codes. Can read bookings but not change money. |
| Content editor | The homepage, page wording, posts, galleries, videos, testimonials, downloads and the team page. Reads events but cannot change them. |
| Registration desk | The check-in screen, and the registrations for the event they are working on. |
| Finance | Bookings, payments, refunds and the sales figures. |
The sidebar, top to bottom
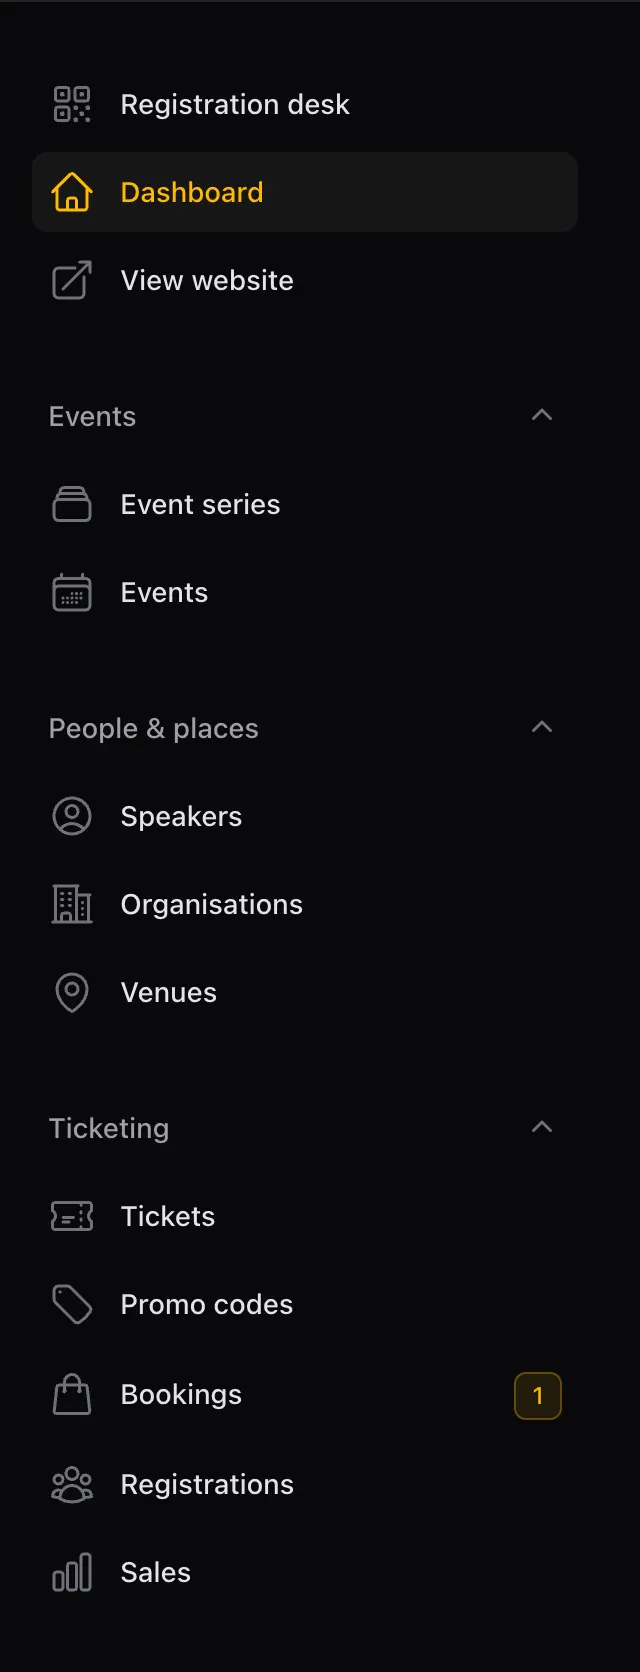
- View website and Registration desk — two doors out of the panel, at the very top.
- Events — the event series, and the events themselves. Almost all of section 2 happens here.
- People & places — speakers, organisations and venues. One record per person or body, reused by every event they take part in.
- Ticketing — tickets, promo codes, bookings, registrations and sales.
- Content — the homepage slider, page wording, posts, headline figures, galleries, videos, testimonials, downloads and the team.
- Enquiries & signups — contact enquiries, sponsorship enquiries and newsletter subscribers. A number beside one of these is how many nobody has opened yet.
- Administration — staff accounts, the site navigation and old address redirects. Administrators only.
The dashboard
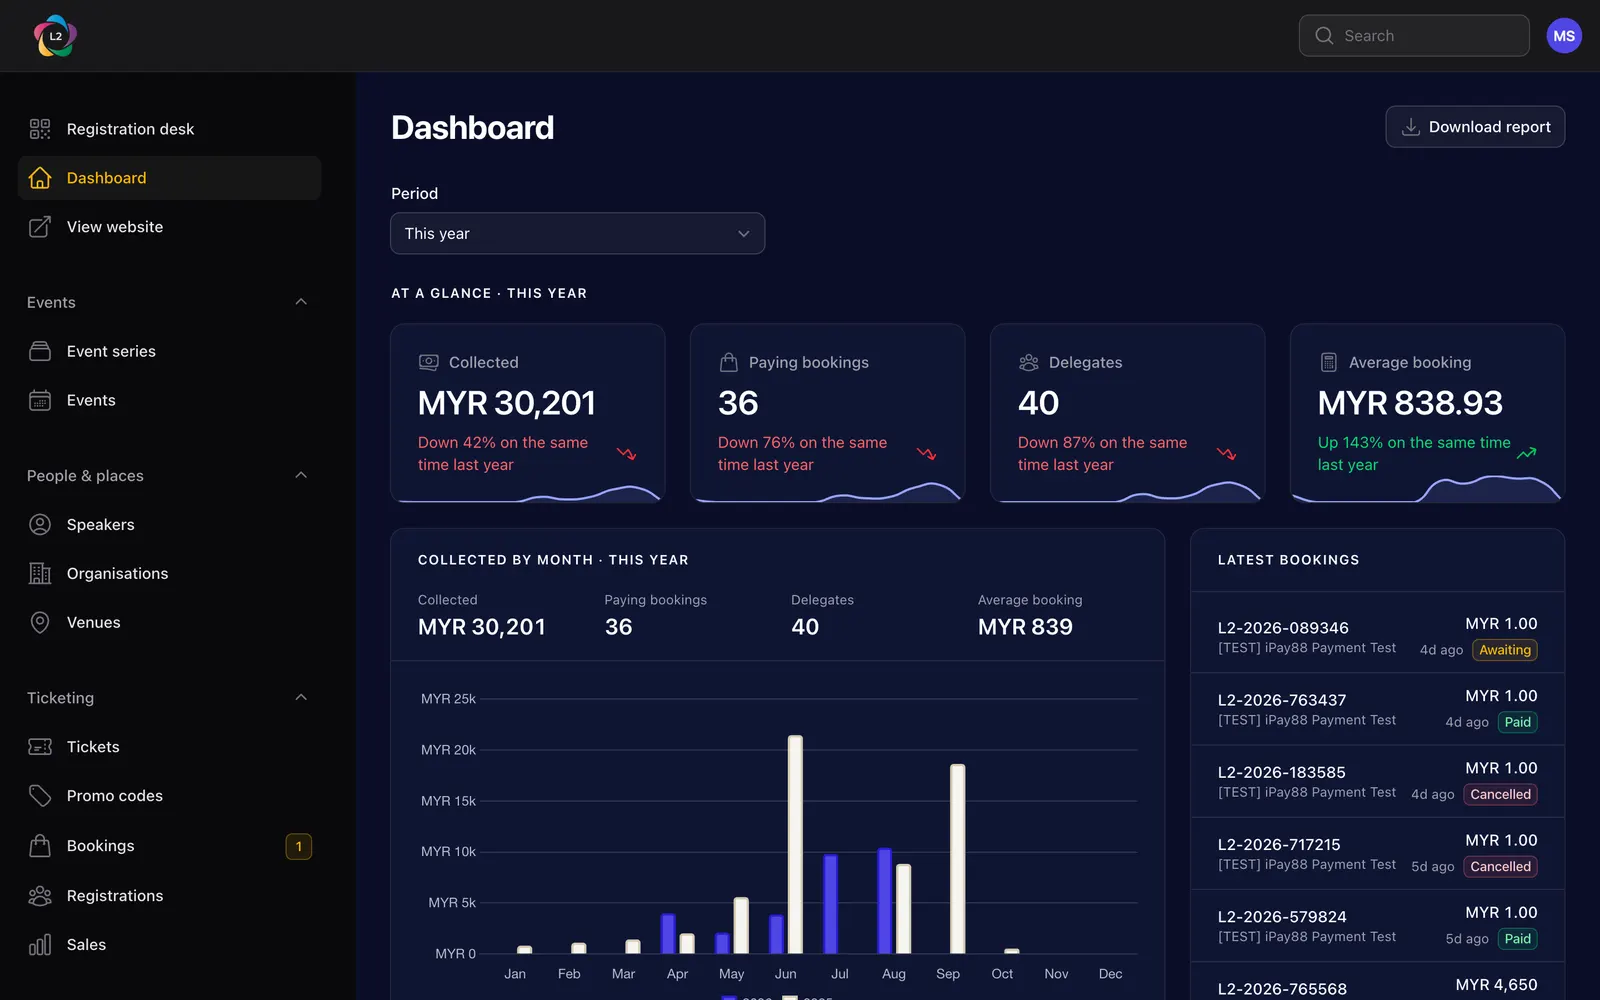
The period selector at the top changes every figure on the page, and Download PDF gives you the same numbers as a document you can send on.
Putting on an event
Seven steps, all of them from the event's own page. You do not need to visit any other screen to build a complete event.
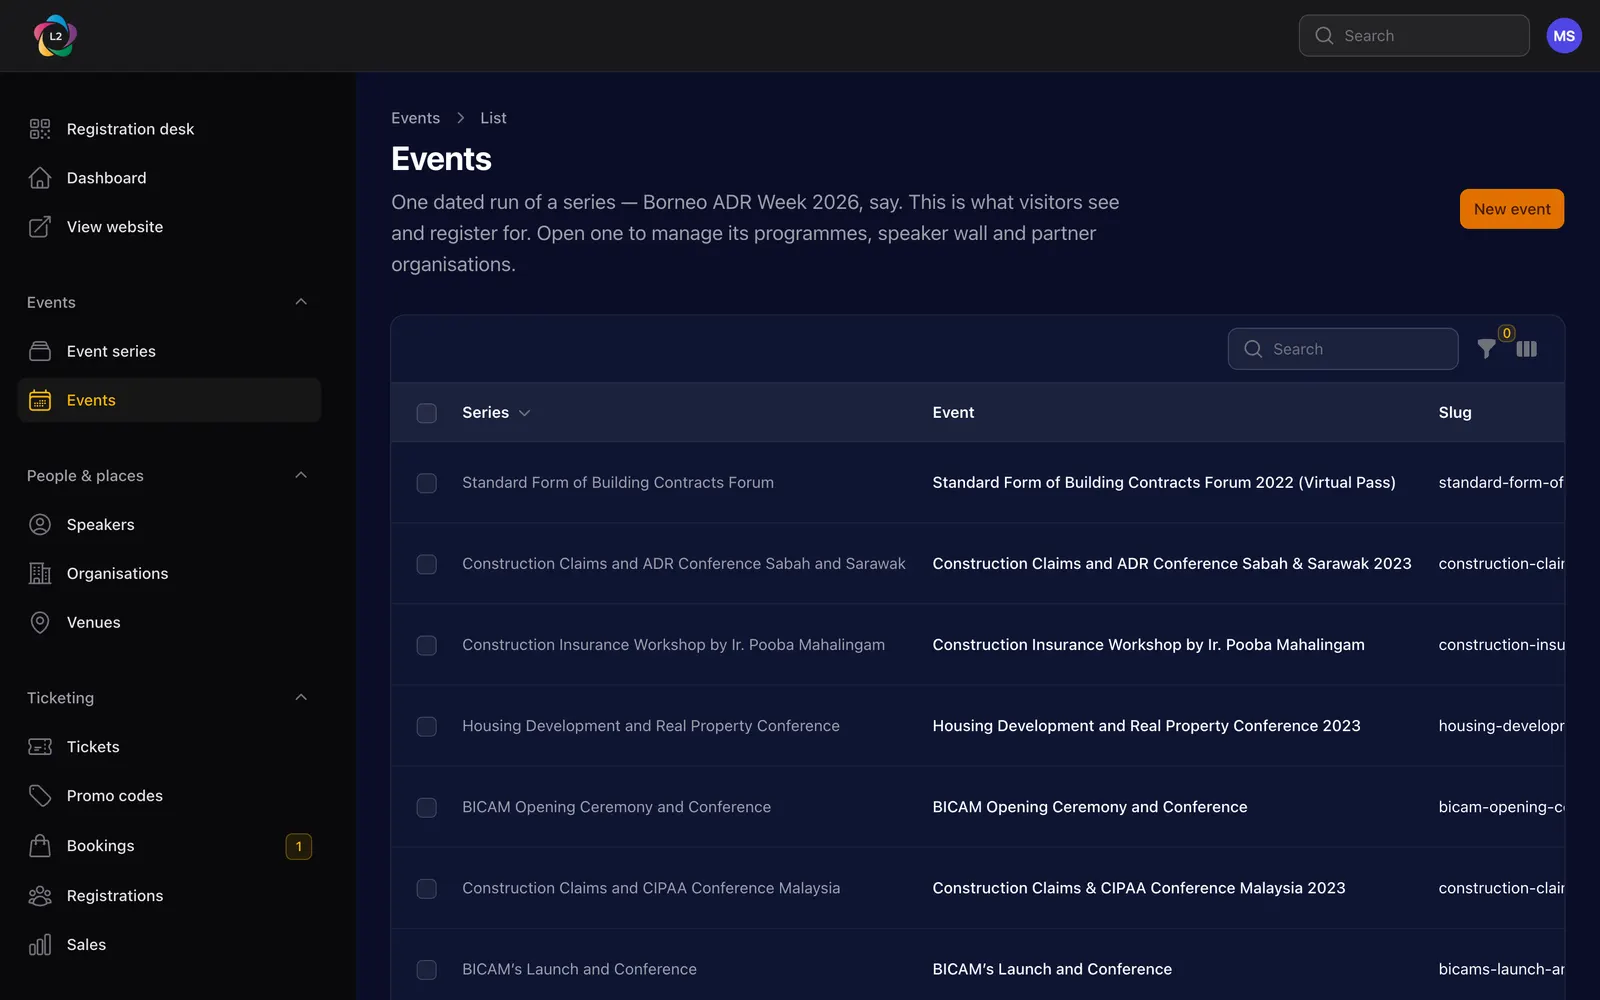
Start at Events › Events. This is the list of actual conferences — Borneo ADR Week 2026, and so on. Event series above it is the family a conference belongs to, so that 2024, 2025 and 2026 sit together; you rarely open it directly.
Create the event
Press New event. You are asked three questions and nothing else — everything the event page can show is filled in afterwards, on the event's own page.
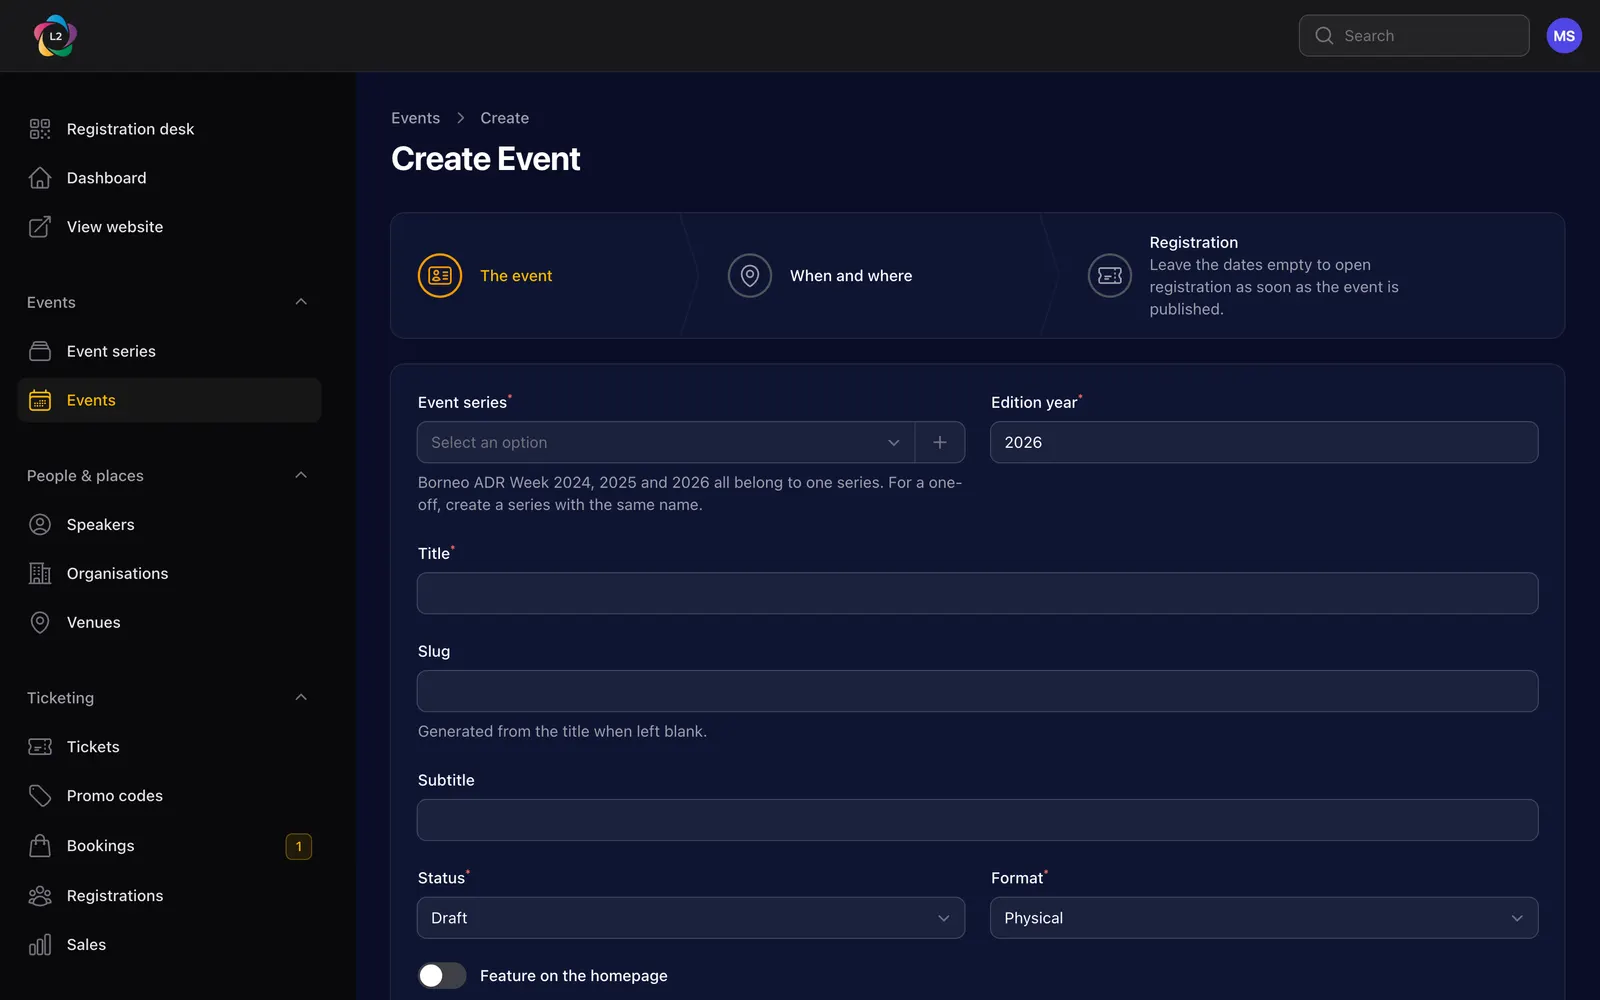
- Event series — pick the family. For a one-off conference, press + Create in that field and give the series the same name as the event; that is all it needs.
- Title — what the event is called on the website, year included: "Borneo ADR Week 2026".
- Status — leave it on Draft while you build. Nothing is public until you set it to Published.
- Format — physical, virtual or hybrid. It decides whether the page shows a venue and a map.
Step 2 asks when and where; step 3, when registration opens and closes. Save, and the panel puts you on the event's own page with its agenda ready.
Write the agenda
Scroll past the form to the tabs at the bottom of the event page and stay on Agenda.
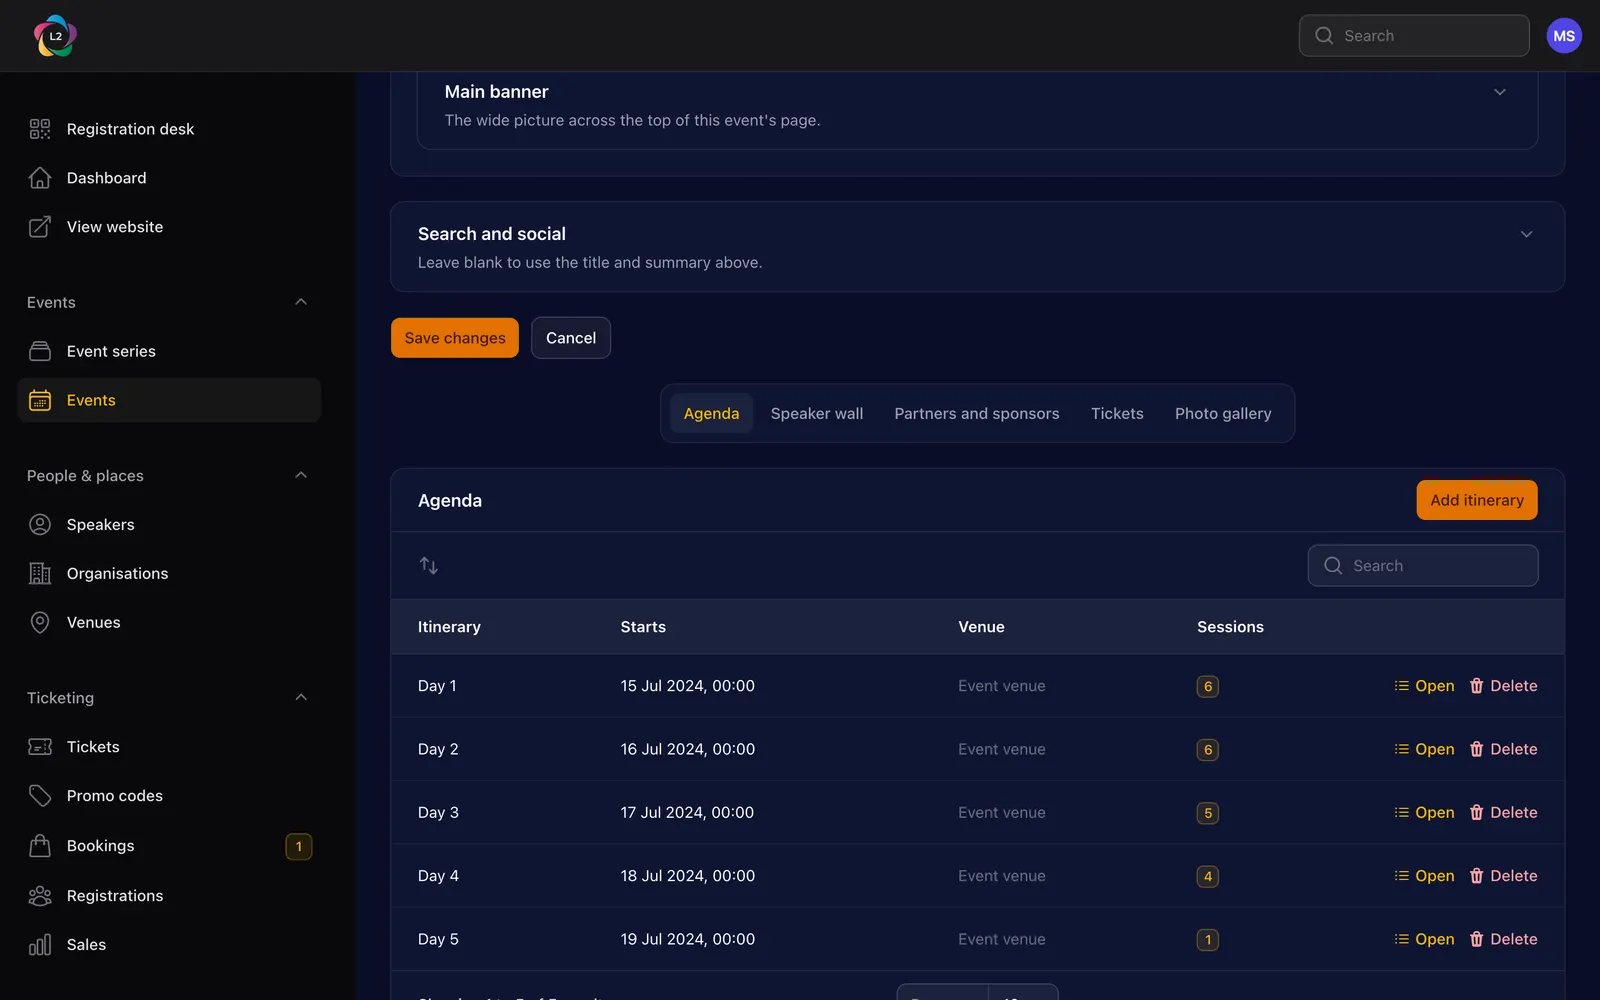
An itinerary is a day of the event. Press Add itinerary and the day is already chosen for you — the first one you have not used yet.
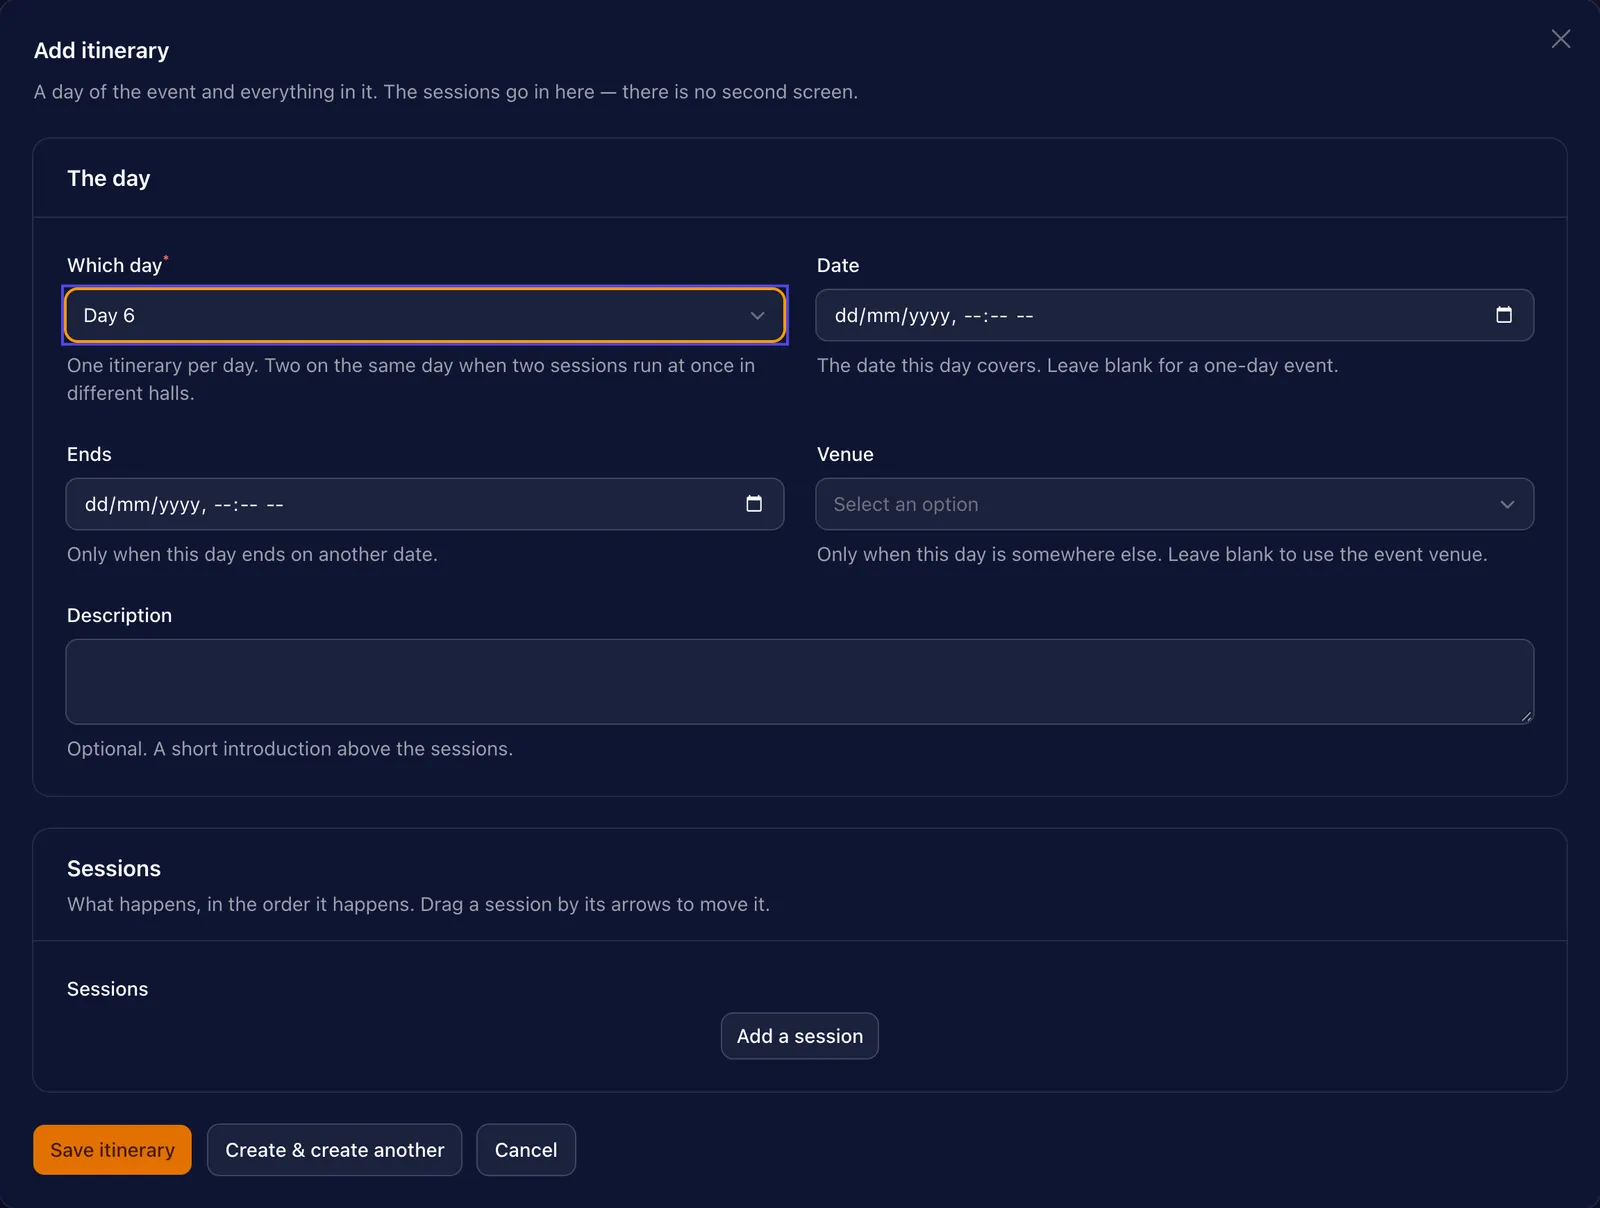
Then press Add a session once per thing that happens — registration, the opening, each panel, lunch, the closing. Sessions are numbered by their position, so dragging one up renumbers the rest.
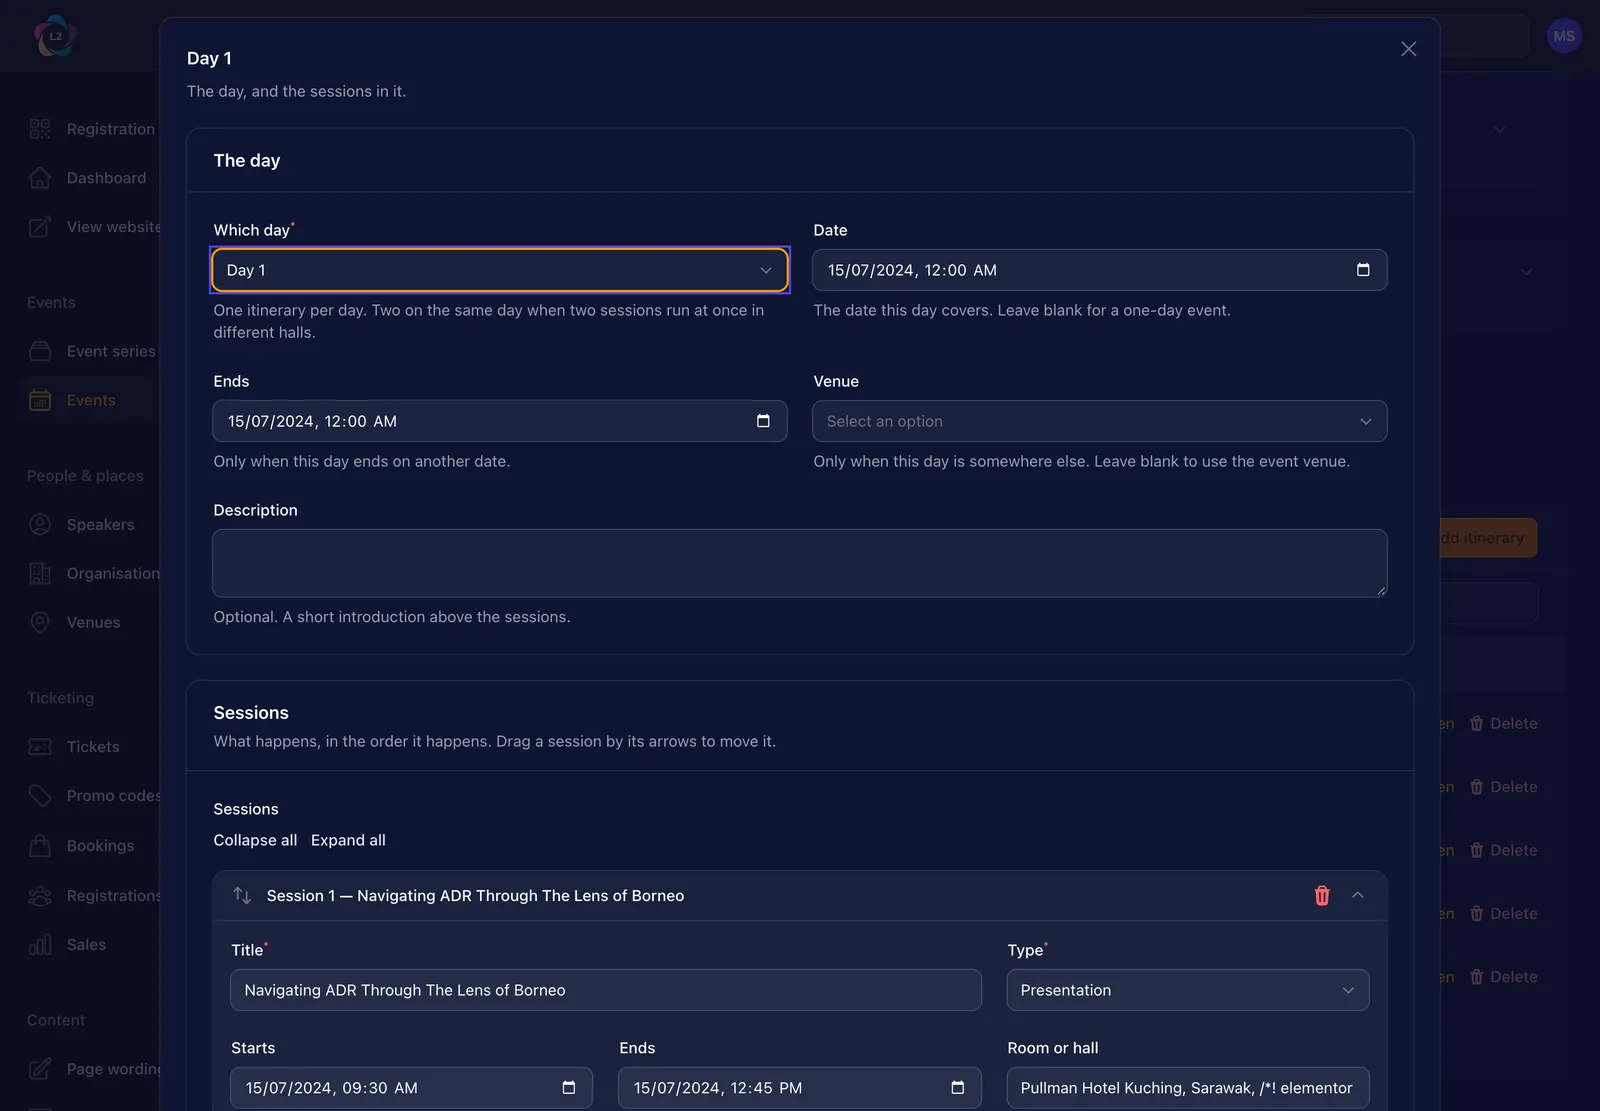
- Type decides how the session is drawn on the page — a break and a keynote do not look alike.
- Room or hall is only needed when the event runs in more than one room.
- Who is on it — add each speaker and say how they are billed: speaker, moderator, chair or panellist. Somebody the site has never heard of can be created right there.
Add a second itinerary for that same day, choose Something else in the day list and give it a name — "Young practitioners track". Both appear on the page, side by side.
Check the speaker wall
The Speaker wall tab is the block of faces on the event page. Everyone you put in the agenda is here already — adding a speaker to a session puts them on the wall for you.
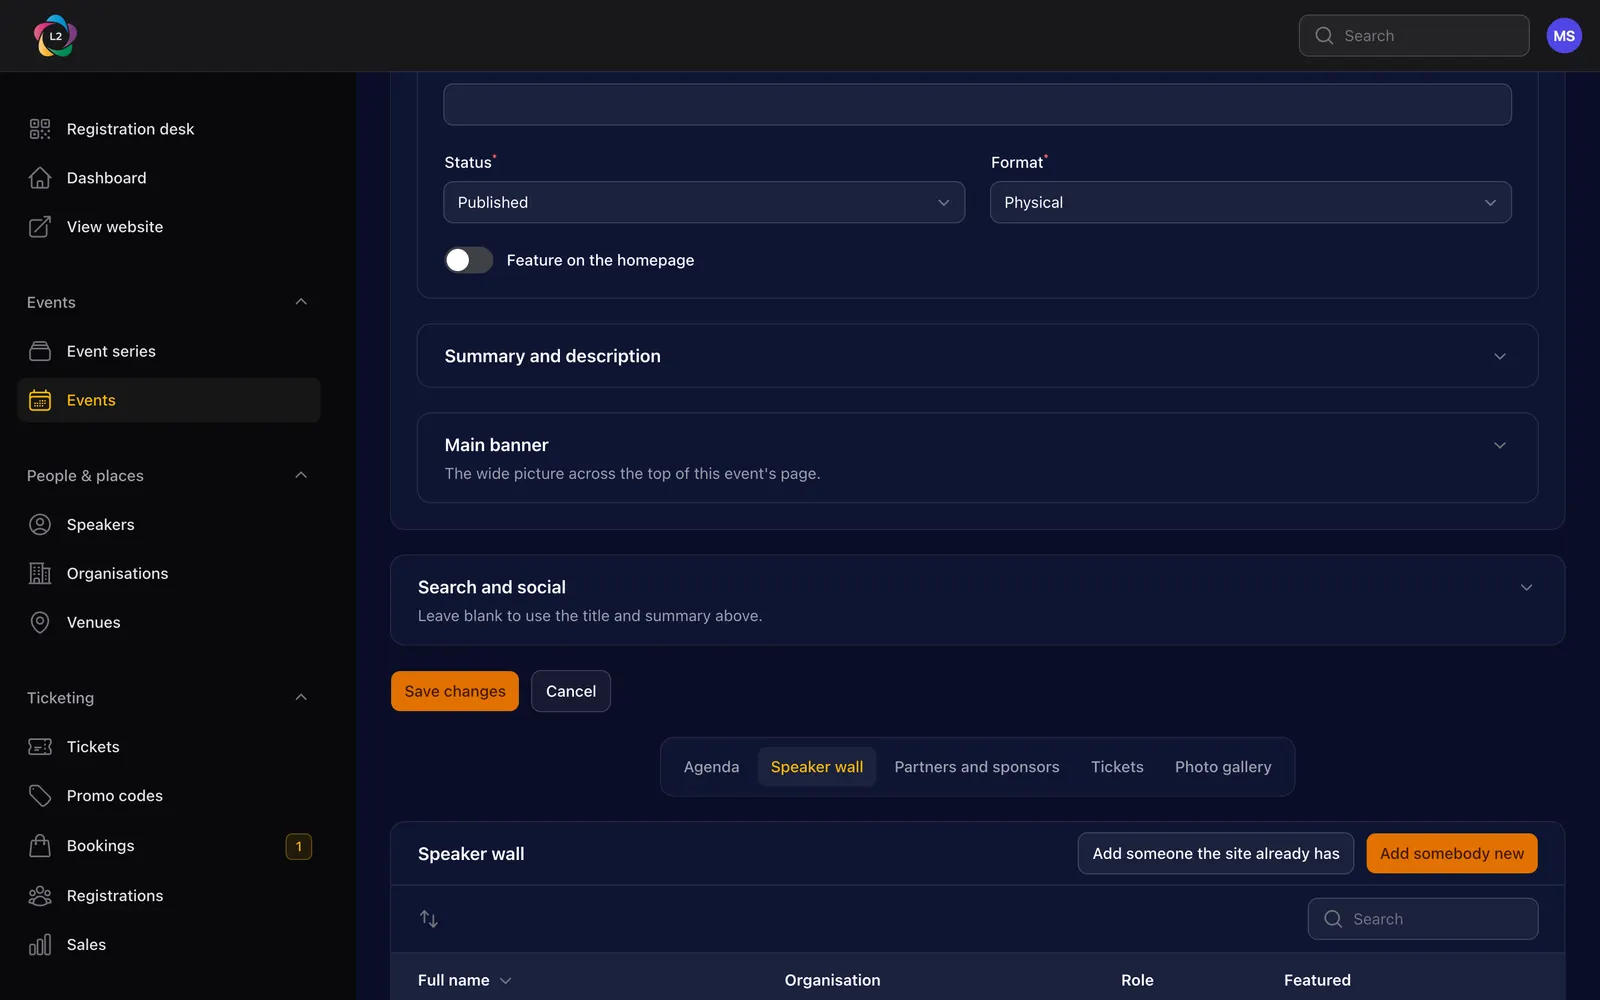
Three things you do here that the agenda cannot:
- Add somebody who never appears in the running order — a guest of honour, or whoever gives the welcome address.
- Change how somebody is billed for this event. The wall accepts keynote, guest of honour and welcome address, which an agenda item does not.
- Turn on Show larger on the speaker wall for the names a visitor should see first.
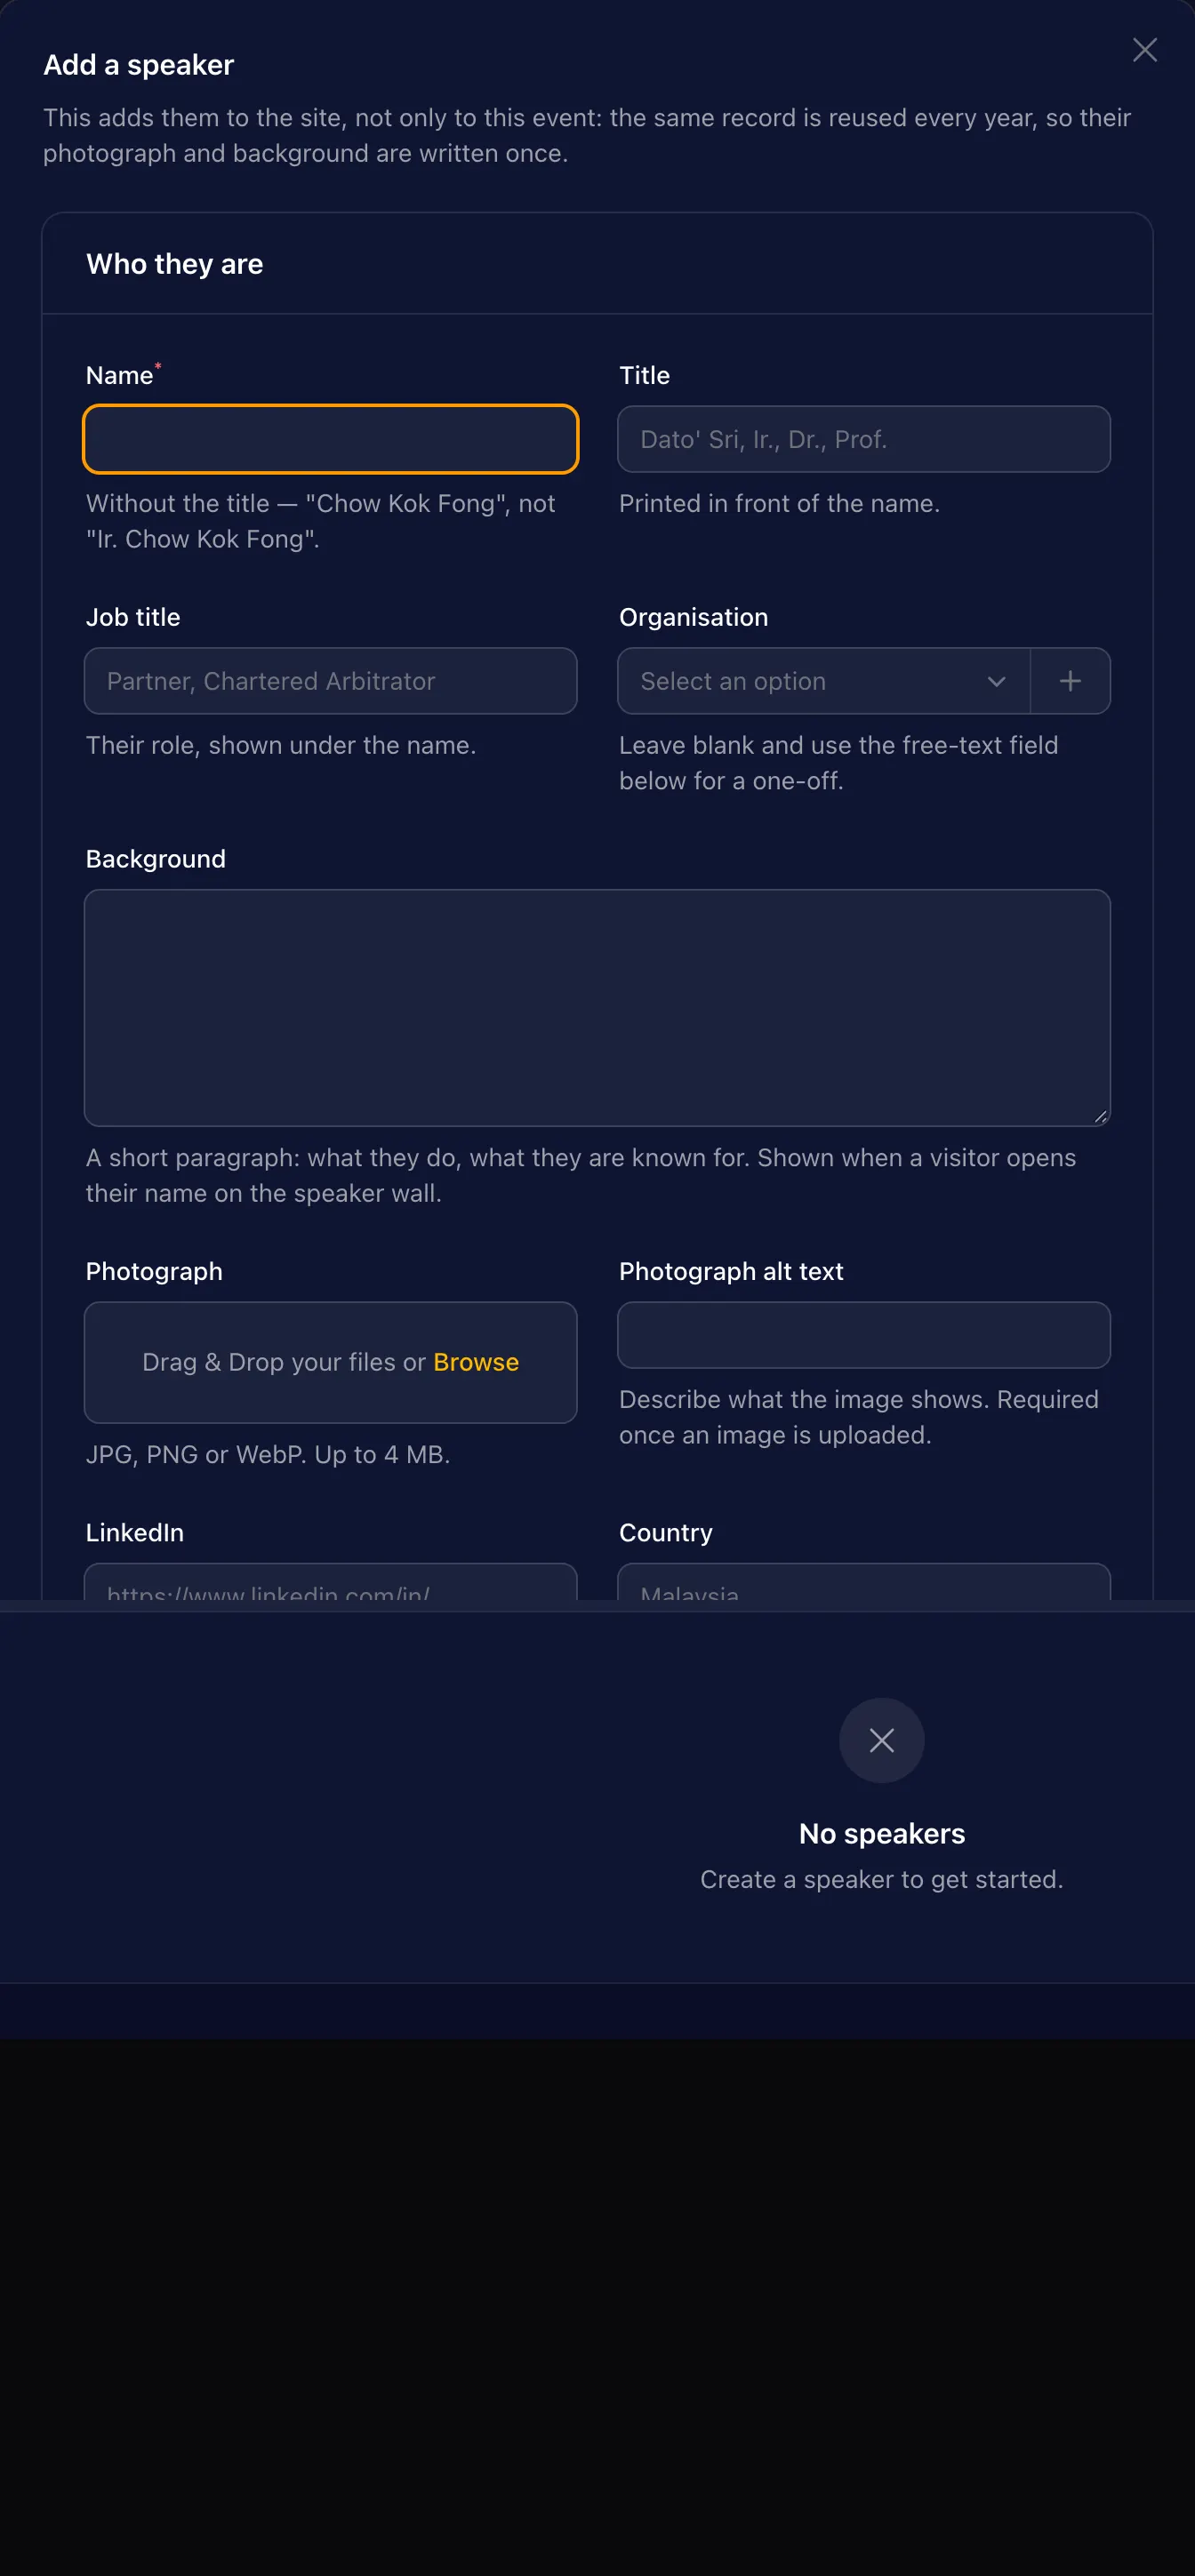
That is deliberate: the wall carries people who never appear in a running order, and a deleted session must not quietly delete a name. Take somebody off the wall on this tab.
Credit the partners and sponsors
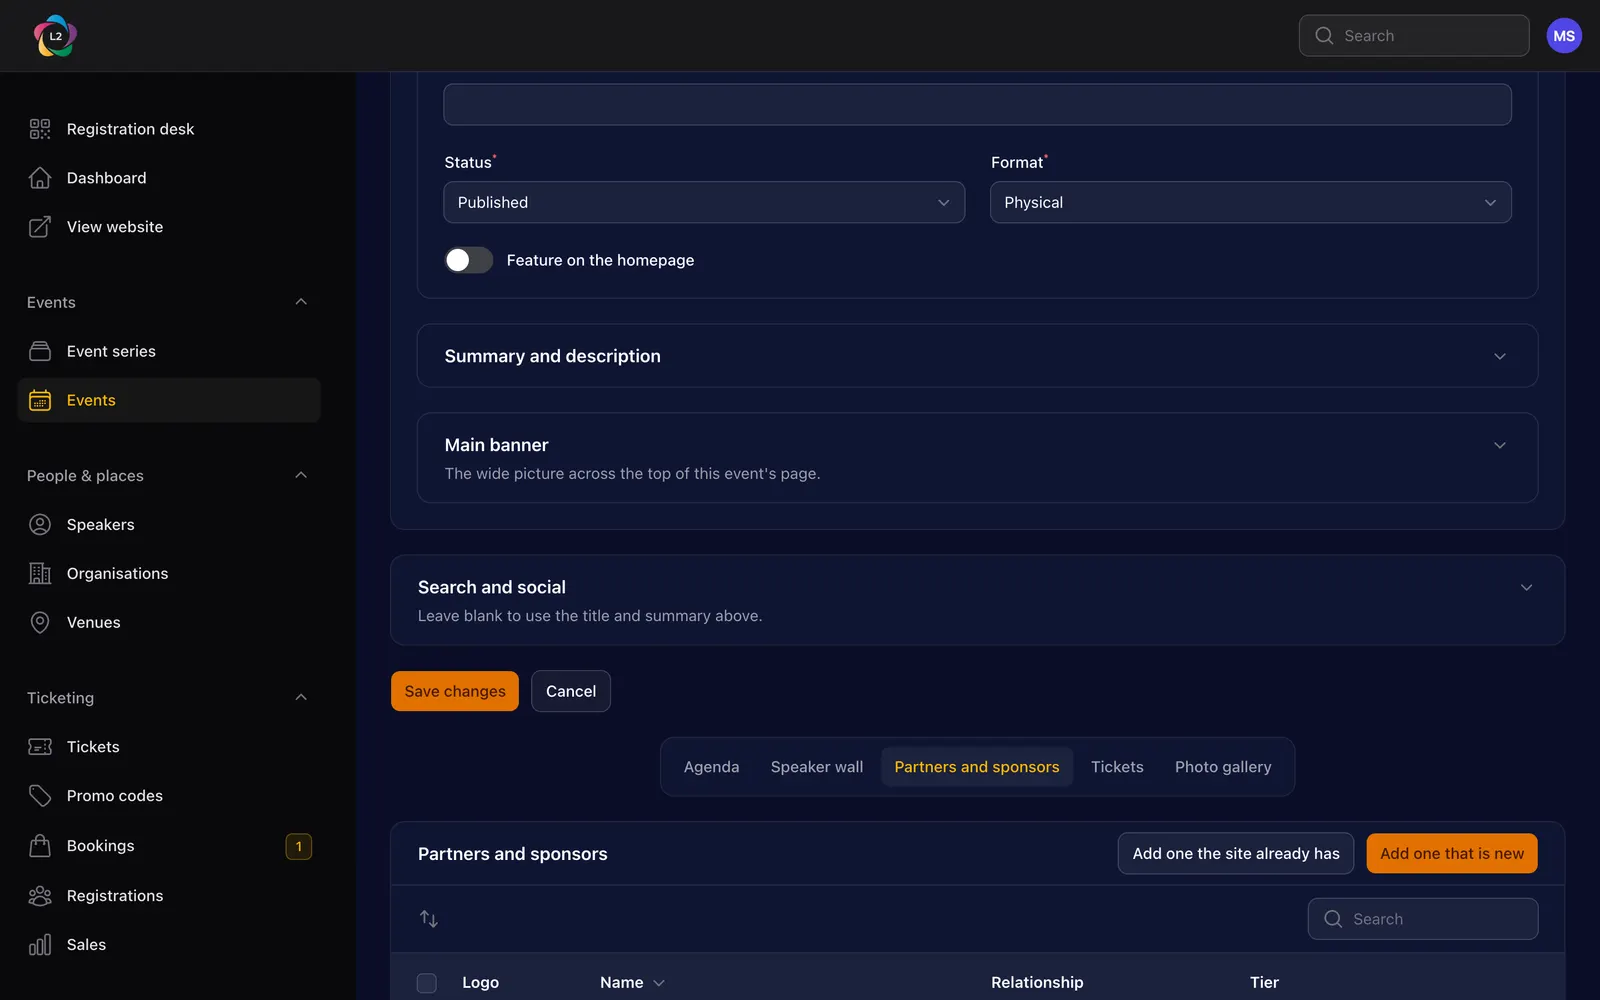
Two buttons, and the difference matters:
- Add one the site already has — search the organisations already on the site. Use this whenever you can: it keeps one logo and one spelling everywhere.
- Add one that is new — for a body the site has never worked with. You give the name and upload the logo once; every future event can then pick them from the list.
What an organisation is — organiser, co-organiser, secretariat, sponsor, supporting organisation, media partner, endorser — is decided per event, so the same body can co-organise one year and sponsor the next without a second record. For a sponsor, the level (platinum down to exhibitor) sets how large the logo is printed.
The page prints the logo instead of the name, so a mark with no wordmark leaves a reader unable to tell who it is. Transparent PNG on a light background works best.
Set up the tickets
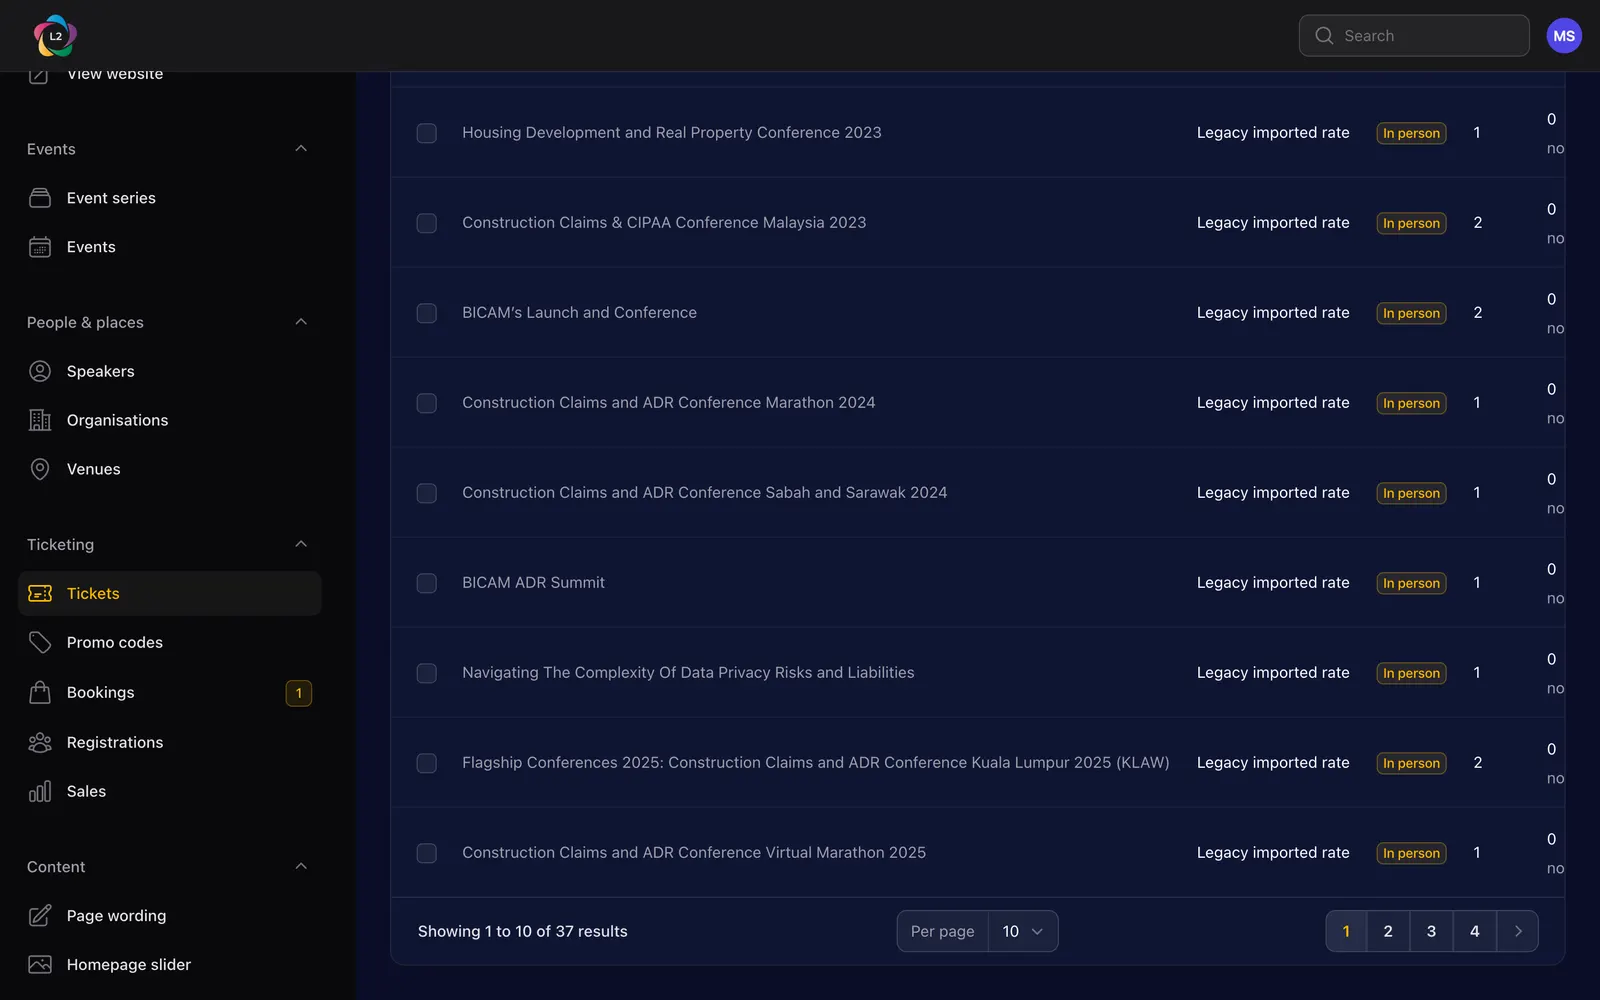
Press Add a ticket, give it a name a delegate would recognise ("Delegate pass", "Student rate", "Table of ten"), then press Set prices on its row to add the rates and the dates each one runs between.
The Tickets list says not shown until priced against any ticket in that state, and the dashboard's Needs action panel lists them too.
Discounts live in Ticketing › Promo codes: a code, a percentage or a fixed amount, an expiry, and a limit on how many times it may be used.
Decide what the page shows
The What shows on the page tab on the event form is a switch per block — agenda, speakers, fees, brochures, venue map, testimonials, photographs, videos and the rest. Turn off what this event does not have rather than leaving an empty heading on the page.
The Search and social section below the tabs sets what Google and WhatsApp show when the page is shared. Leave it blank and the site uses the title and summary you already wrote.
Publish
Back on the Details tab, set Status to Published and press Save changes. The event appears on the homepage, in the Registration Hub and in the sitemap within the minute.
Registration opens and closes on the dates in step 3 — you do not have to come back and switch anything on the day.
Open last year's event and press Clone edition. It copies the agenda, the speakers, the organisations and the tickets into a new draft, and you correct the dates from there.
After the event
Photographs, and anything else that only exists once the conference has happened.
Photographs
The Photo gallery tab on the event holds albums — one per occasion, so a three-day conference might have a day-one album, a gala dinner album and a site-visit album.
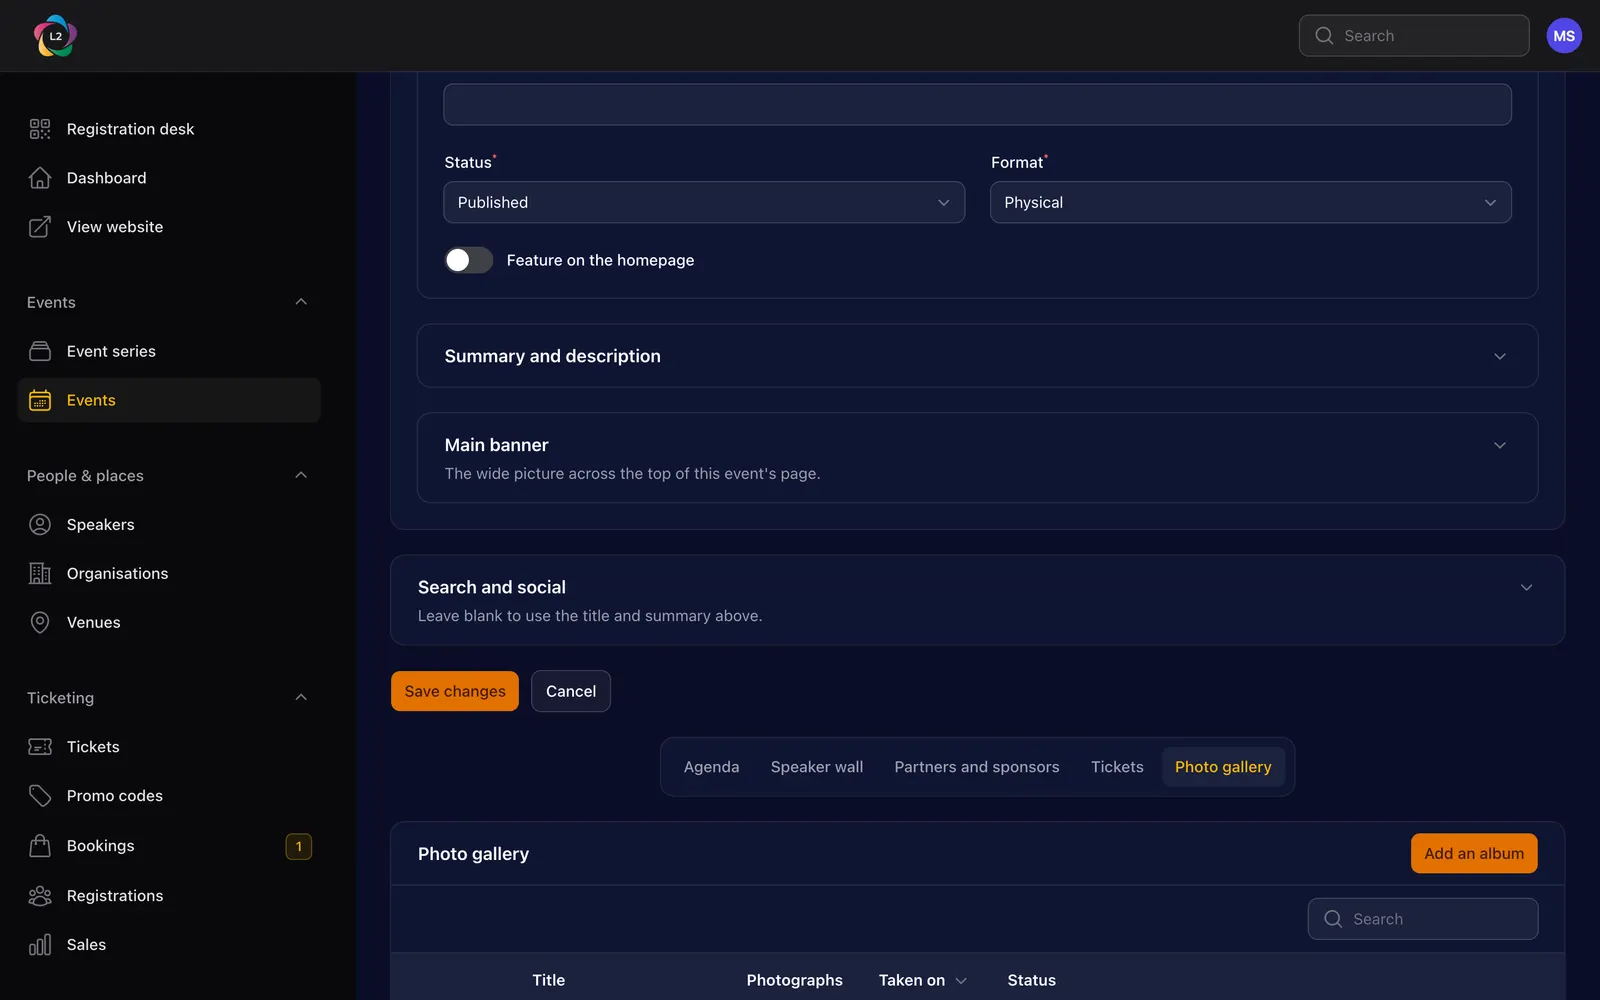
Press Add an album, name it, and drag in as many photographs as you like at once — up to sixty per go.
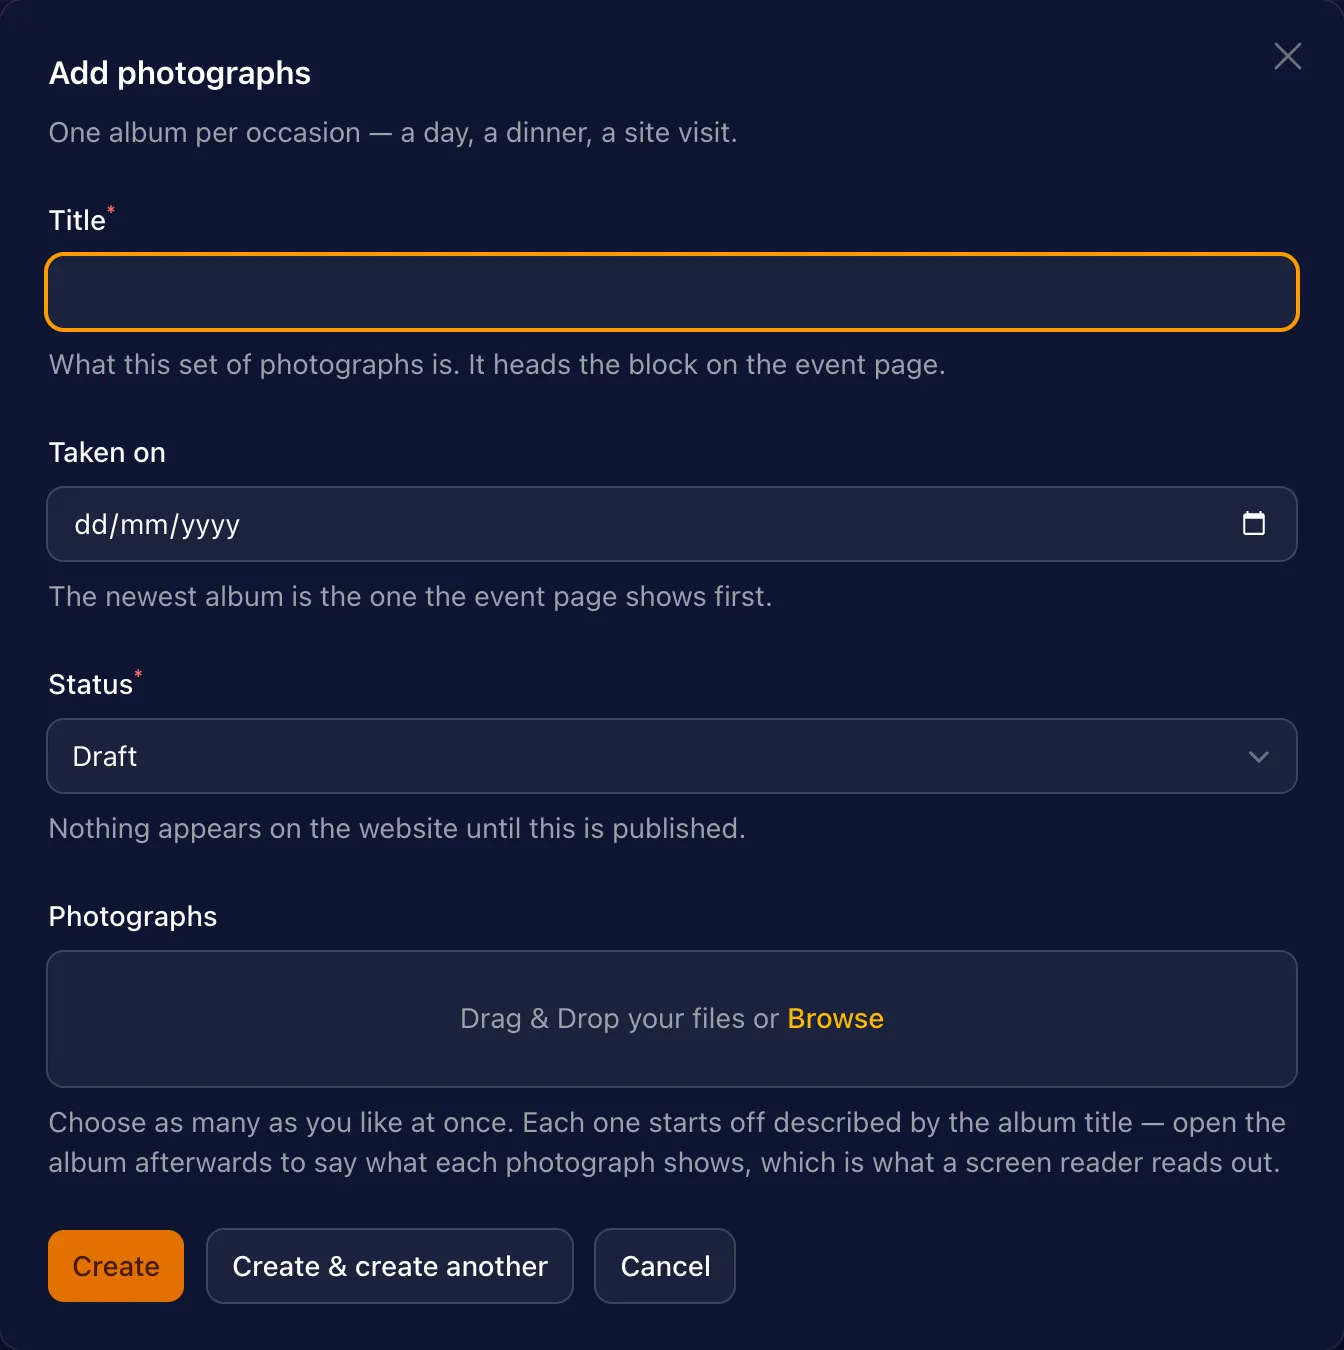
Every photograph needs a description — it is what a blind visitor's screen reader reads out, and what shows if the image fails to load. A bulk upload starts each one off with the album's title, which is true but not useful, so open the album afterwards with Describe and reorder and write what each picture actually shows. The first photograph in the album leads the block on the event page.
Nothing is public until the album's status is Published.
Brochures, reports and recordings
PDFs go in Content › Downloads and are attached to an event; they appear under the event page's brochure block and in Resources. Recordings go in Content › Videos as a YouTube or Vimeo address — the site handles the player.
The rest of the website
Everything in Content, which is where the pages that are not events are edited.
The homepage slider
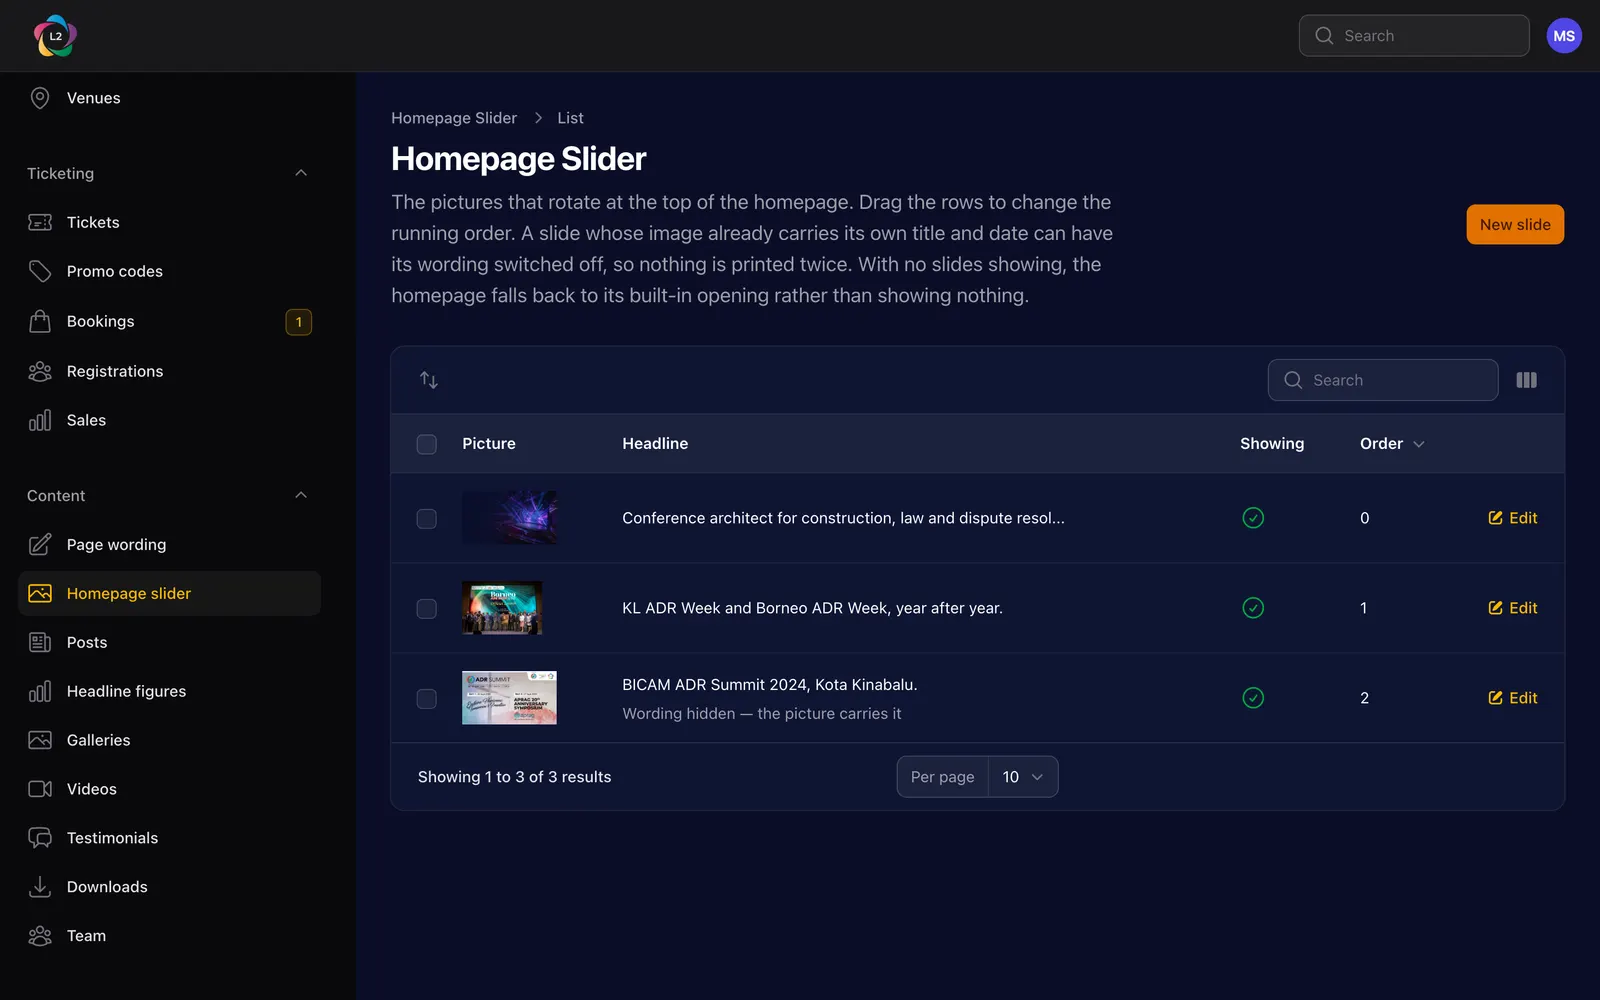
Each slide takes a picture, a small line above the headline, the headline itself and up to two buttons. Turn Show text off when the picture already carries its own title and date.
Page wording
Content › Page wording holds the standing sentences on the homepage, About, Partners, Contact, HRD Corp and Resources pages — headings, the small uppercase line above them, and the paragraph underneath. Anything you leave blank falls back to the wording the site shipped with, so you can never empty a page by accident.
Posts, testimonials, figures and the team
- Posts — articles and press releases, shown in Resources.
- Testimonials — a quote, who said it, and which event it belongs to.
- Headline figures — the "150+ conferences, 10,000+ delegates" numbers on the homepage and About page.
- Team — the people on the About page.
Navigation and old addresses
Administration › Navigation is the header and footer menus: drag to reorder, and an item can point at any page on the site. Old address redirects sends an address from the previous WordPress site to wherever that content lives now, so a link in an old email still works.
Bookings and money
Ticketing › Bookings is every registration taken through the website.
What each status means
| Status | What happened | What to do |
|---|---|---|
| Not paid | A booking was started and no payment has been made. | Nothing. Unpaid bookings release their seats automatically after the holding period. |
| Awaiting payment | They chose bank transfer and the money has not arrived. | Confirm it when the transfer lands — see below. |
| Paid | Paid in full. Passes and the confirmation email have gone out. | Nothing. |
| Cancelled | Cancelled by the delegate or by us. | Nothing. The seats are back on sale. |
| Refunded | Money returned. | Nothing. |
Confirming a bank transfer
Open the booking, find the Payments panel, and press Money received. Enter the bank reference from the statement. The booking turns Paid, the delegate's passes are generated and the confirmation email is sent — you do not send anything by hand.
If the proof of payment does not match anything on the statement, Not found records that, with a note saying what is wrong.
Invoices, passes and refunds
On a booking you can Issue invoice (once the company details are set — see Settings), Download invoice, Download passes, Resend email, Cancel booking and Record a refund. A refund asks for the amount and whether the seats go back on sale; it records what we did, it does not move money — that is done in the bank or in iPay88.
Registrations
Ticketing › Registrations is the delegates themselves rather than the bookings — the list the desk works from, and the list you export for badges. A name can be changed up to the deadline set on the event, and a seat can be transferred to somebody else.
Sales
Ticketing › Sales is what has sold, per ticket, per event: how many, how much, and how much is still unpaid.
The registration desk
On the day, at the door, on a phone.
Open www.l2icon.org/checkin — or press Registration desk at the top of the sidebar. It is built for a phone held in one hand, not for the panel.
- Point the camera at the QR code on the delegate's pass; it checks them in.
- No pass? Search by name and check them in from the list.
- A pass already used says so, with the time it was first scanned.
Desk staff need only the registration desk role. It gives them this screen and the delegate list, and nothing else — no bookings, no money, no identity-card numbers.
Enquiries and the newsletter
Contact enquiries
Anything sent through the contact form lands in Enquiries & signups › Contact enquiries, and is emailed to reg@l2icon.org as it arrives. The number beside the menu item is how many nobody has opened yet.
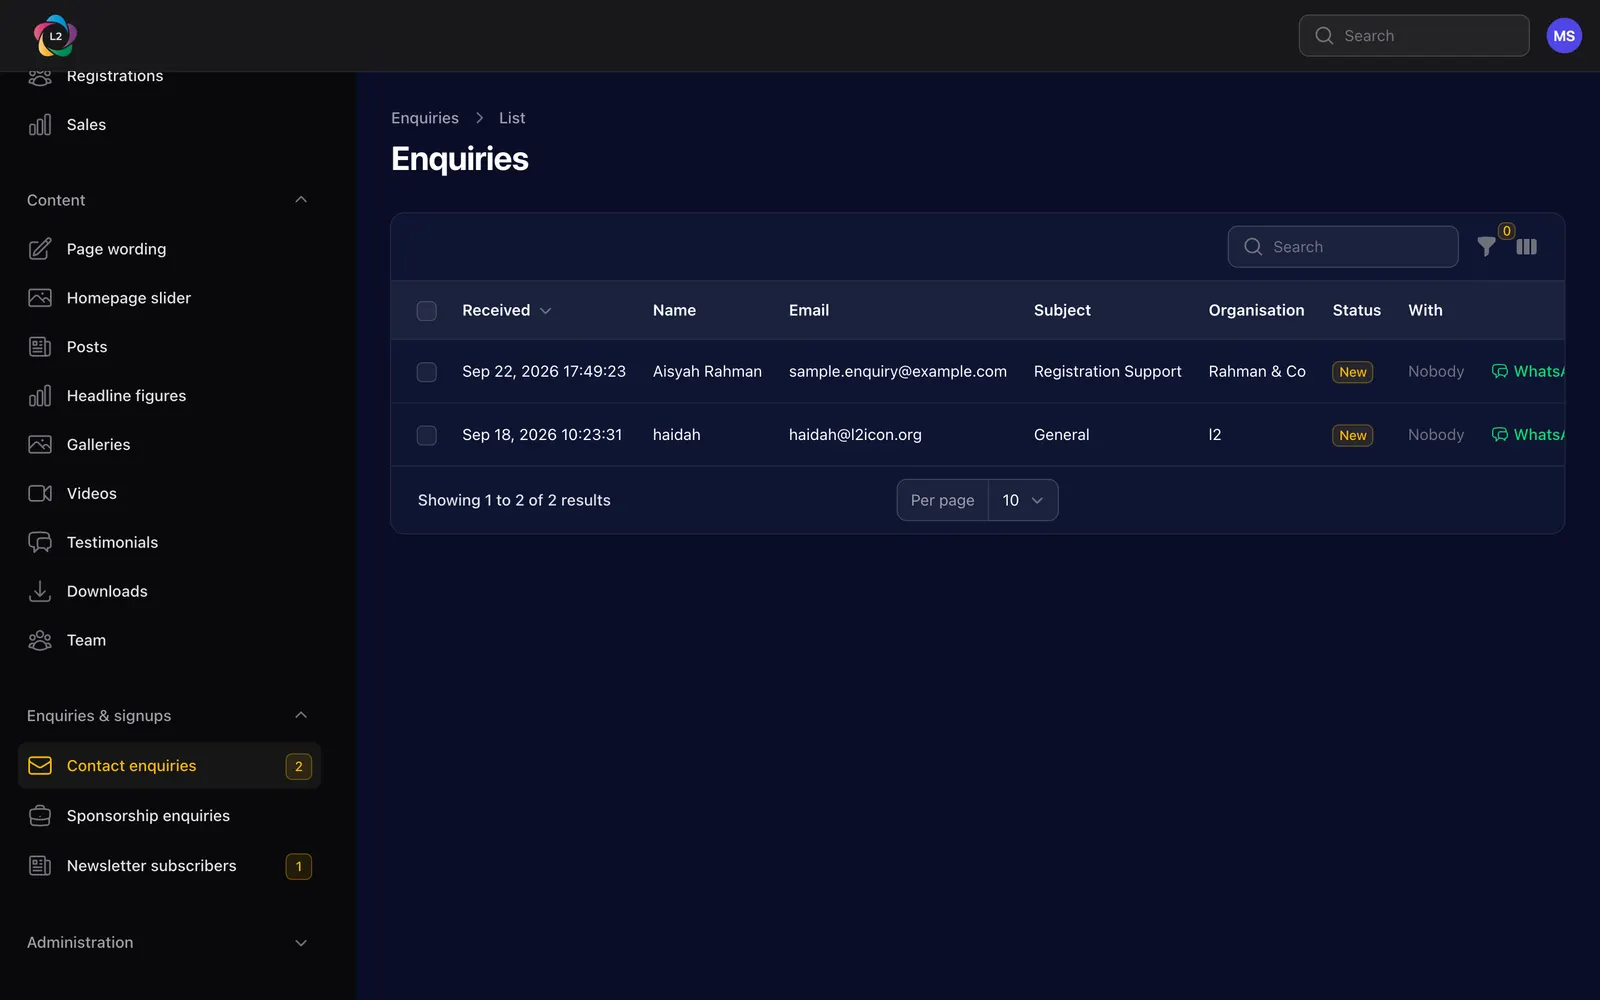
Open an enquiry to answer it.
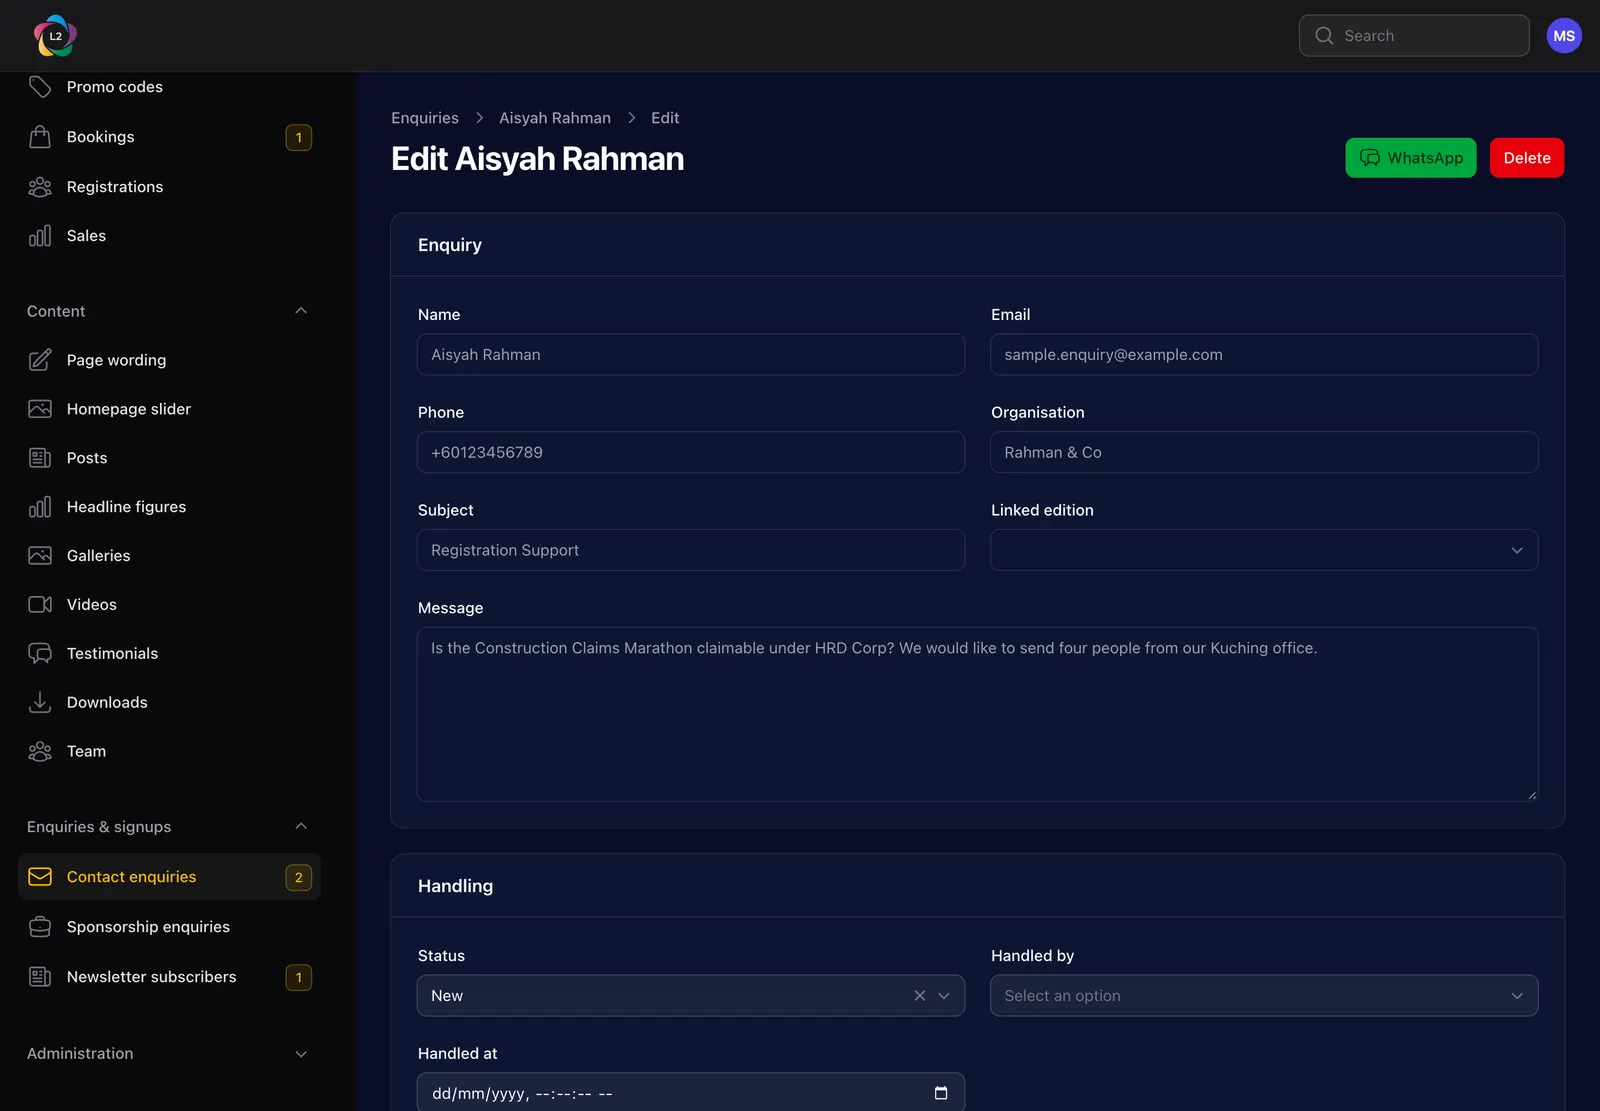
- Set Being handled and put your name against it so two people do not answer the same message.
- Write the reply, Save as draft as often as you like, and only press send when it is ready.
- Sending marks the enquiry Replied and keeps a copy of what was sent.
Sponsorship enquiries
The Partners page form is kept separately, with the track the enquirer chose — institutional, supporting organisation or sponsorship — so it reaches whoever handles partnerships.
Newsletter subscribers
Everyone who signed up through the footer, with the date they confirmed. Sign-ups are double opt-in: the address only becomes a subscriber after the person clicks the link in the confirming email. You can export the list, and remove anybody who asks.
Settings
Administrators only. These are the settings the website runs on — change them deliberately.
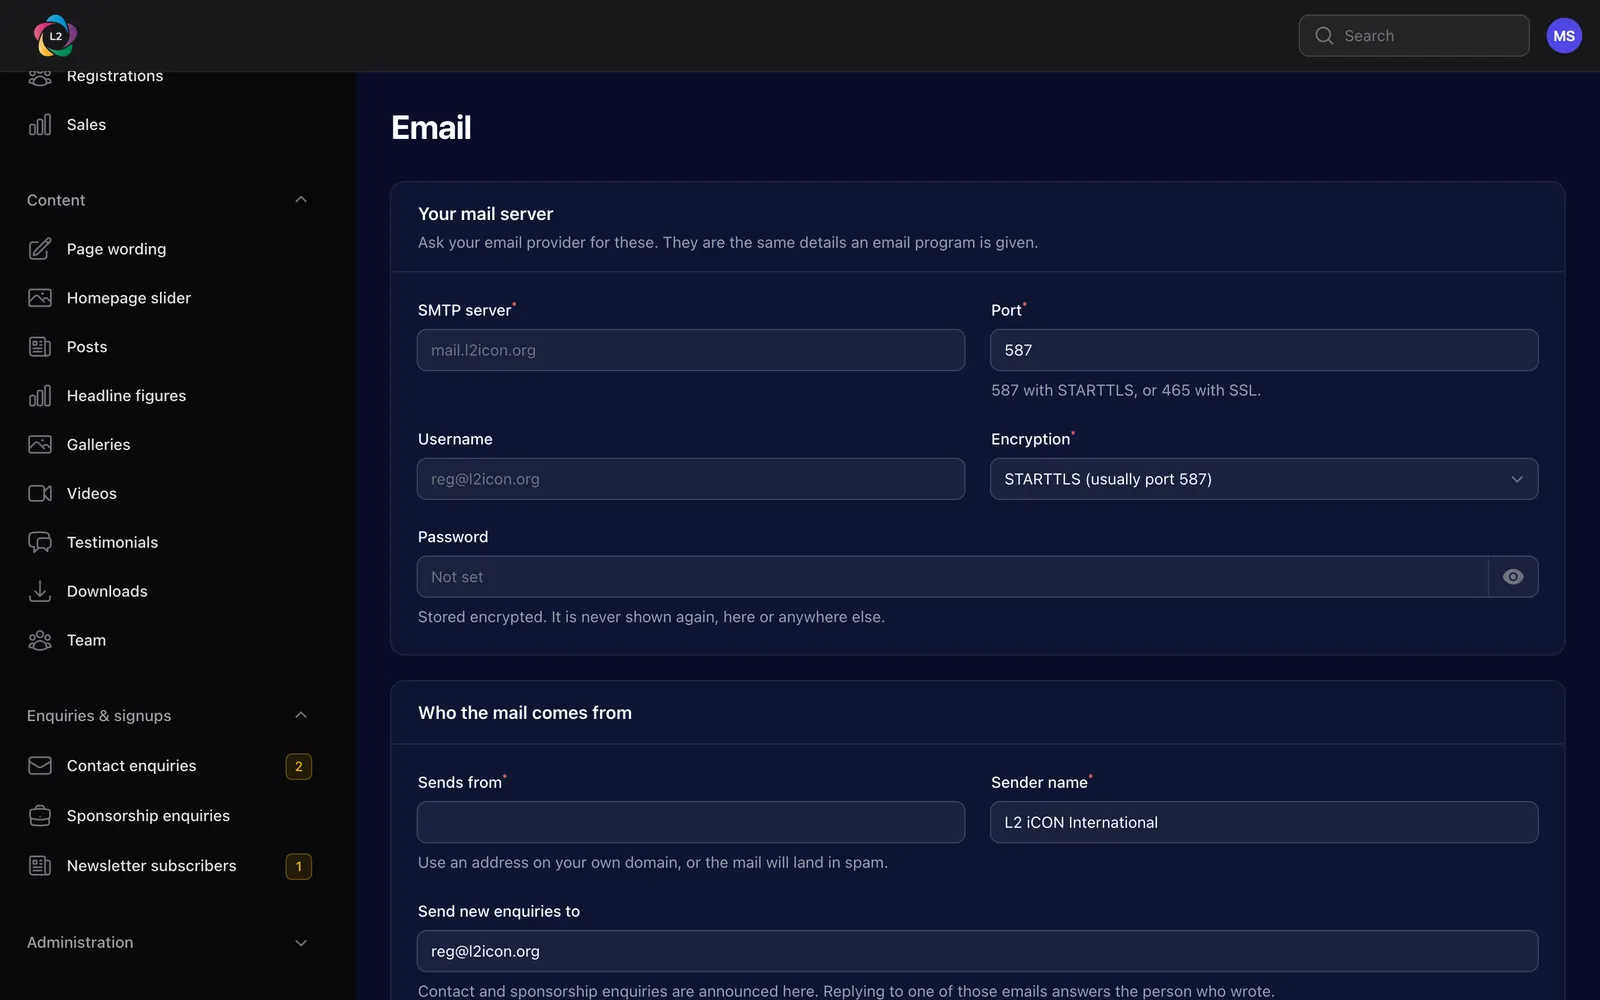
Send new enquiries to is the address that gets told when somebody writes through the website. It is reg@l2icon.org today; change it here and the change takes effect immediately.
Mail is sent from our own server so that it passes the checks that keep it out of spam. A wrong setting here stops every email on the site, quietly.
Payments
Bank transfer details — the account a delegate is asked to pay into — and the iPay88 merchant code and key for card payment. Card payment is off at the moment: no iPay88 credentials are saved, so checkout offers bank transfer only. Entering the merchant code and key turns card payment on for every event.
The company details on this page are what an invoice is issued under. Without a registered name, company number and address, Issue invoice refuses to produce a document — a finance office will not pay against one that lacks them.
Branding
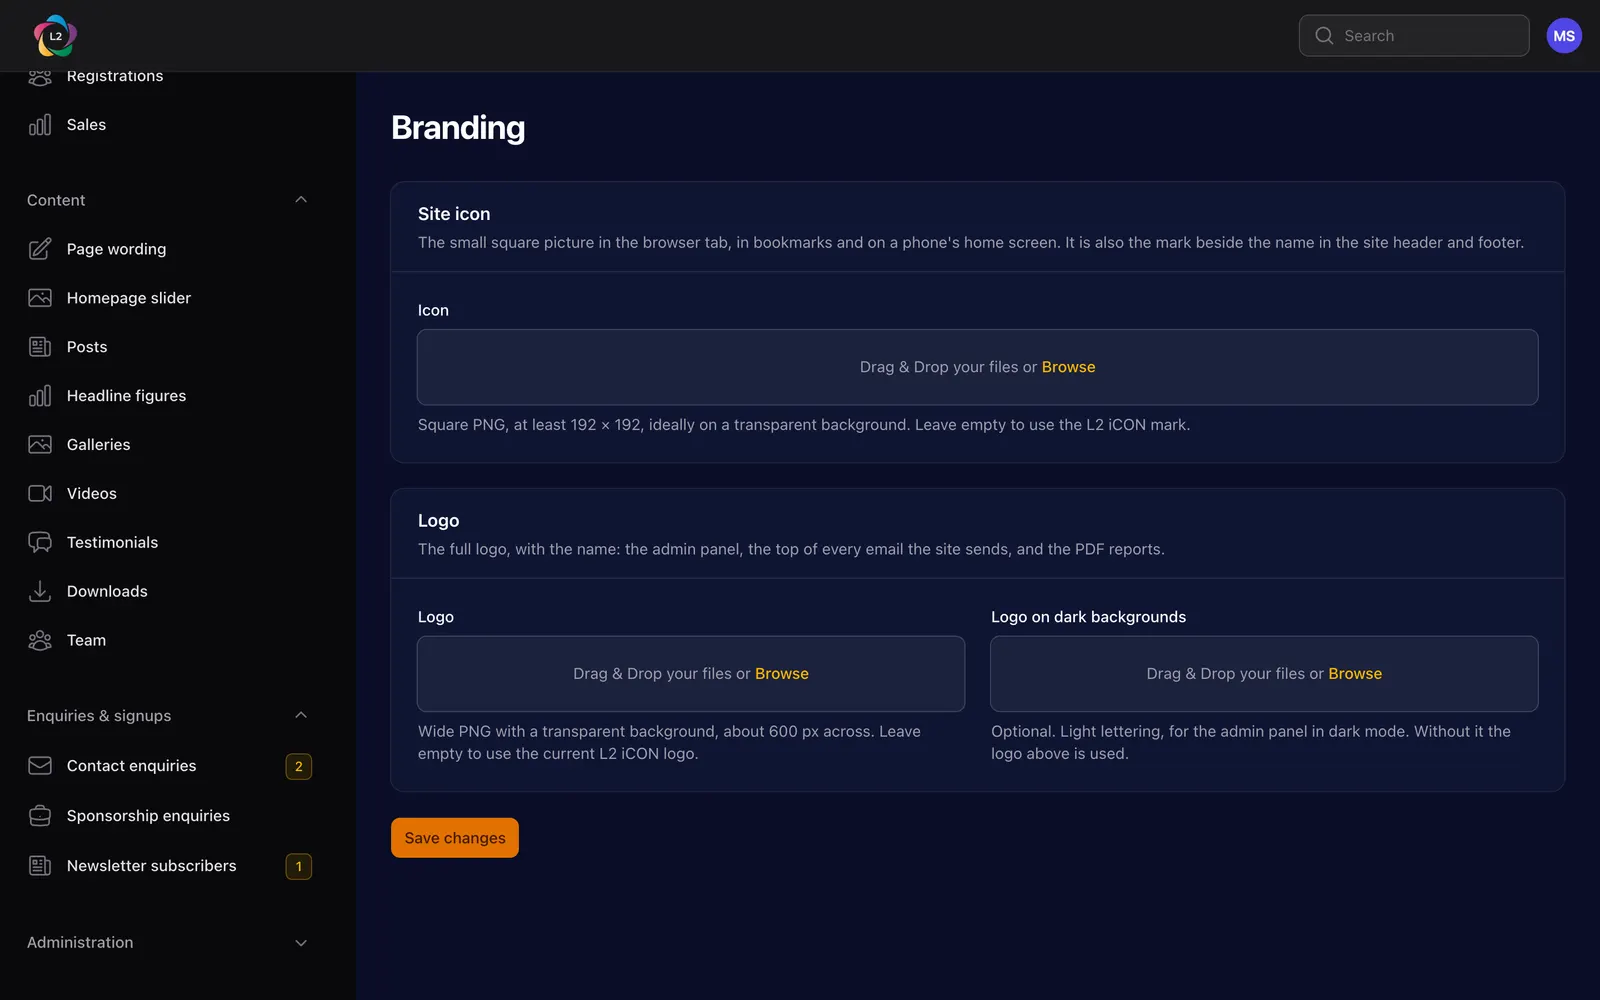
Three images: the site icon (square, for the browser tab and a phone's home screen), the logo, and the logo for dark backgrounds — the navy header would swallow a dark mark, so a light version is kept for it.
Staff accounts
Administration › Staff & users. Create an account, give it one role, and the person receives a password-reset email to set their own password. Remove the role of anybody who leaves — the account then has no way into the panel at all.
Questions we get asked
My event is not on the website.
Check the status on the Details tab. A Draft event is invisible to everybody but us. If it is published and still missing from the homepage, the homepage only lists events that have not finished yet — a past event lives in the archive instead.
The fees table is empty on the event page.
A ticket only appears once it has a price. Open Tickets on the event, press Set prices and add at least one rate.
A speaker is in the agenda but not on the speaker wall.
They should be added automatically when the itinerary is saved. If one is missing, open the Speaker wall tab and use Add someone the site already has — the record exists, it just is not linked to this event.
Somebody changed their job title. Do I fix it on every event?
No. A speaker is one record for the whole site: edit them once under People & places › Speakers and every event they have ever spoken at shows the new title.
A delegate says they never got their confirmation.
Open the booking and press Resend email. Ask them to check spam first — a first email from a new address often lands there.
Somebody wants to send a colleague instead.
Open Ticketing › Registrations, find the delegate and transfer the seat. Do it before the event's name-change deadline; after that the badge and the delegate list are already printed.
I uploaded a logo and the page still shows the organisation's name.
The logo lives on the organisation record, not on the event. Upload it once under People & places › Organisations, or with Add one that is new from the event, and every event that credits them picks it up.
Can I undo a delete?
Events can be restored — deleting one hides it rather than destroying it, and an administrator can bring it back. Most other things cannot, so read the confirmation before pressing the button.
Something is broken, or I am not sure.
Write it down with the page you were on and what you pressed, and send it to SawangVille. A screenshot of the whole window, address bar included, saves a round of questions.